Materials
| Toolbar | Menu | Panel Gear Menu |
|---|---|---|
|
|
Render Material Editor Panels Materials |
Materials |
The Materials command opens the Materials panel which specifies the color, finish, transparency, texture, and bump for use by the built-in Rhino renderer.
-
Materials can be dragged and dropped onto any Material, Texture, and Environment control.
-
Colors can be dragged from a color swatch and dropped onto a different color swatch.
-
Drag a texture from a texture field and drop it onto a different texture field to move. Hold the Ctrl key to copy.
-
Material Editor displays materials used by objects in linked 3dm files. The materials can be used in the current model, but they are not editable. Double-click a linked block to edit the materials in a new Rhino window.
-
Material preview thumbnails are rendered by the selected render device in Options > Cycles.

-
When assigning a material to a block instance, you will be prompted a question. The material will be assigned differently depending on how you answer the question.
Yes assigns the material to all objects in the block instance.
No assigns the material to the block instance. Objects in the block instance need to set Use Object Parent to inherit the block instance's material.
-
Render contents (materials, environment, and textures) can be hidden by plug-ins or scripts. More information...
![]() Materials panel
Materials panel
Materials panel toolbar
The Materials panel has additional browsing tools.
 Back
Back
Selects the previous item in the list.
 Forward
Selects the next item in the list.
 Current item
Displays the current item icon and name.
 Search
- Click the search box (magnifying glass) to display a menu for searching names, notes, or tags.
 Search Names
Limits the search to names.
 Search Notes
Limits the search to notes.
 Search Tags
Limits the search to tags.
- When tags: is selected, a list of available tags appears. These tags are gathered from the materials, environments, and textures in the document.
- In the tags list, arrow keys move up and down and the selected tag is appended to the search.
- Type a semicolon to keep the selected tag and append a semicolon to the search.
- Backspace removes the last tag from the search.
- Once the focus is on the tags list, you can navigate the list using the keyboard with the semicolon and backspace keys appending and removing tags from the search without having to use the mouse.
Show Search Tips
Displays how 'name:', 'note:', 'tag:', '?', '#' and '^' are used for searching items.
 Menu
Menu
Displays the Tools menu.
 Help
Help
Thumbnail preview actions
- Right-click a thumbnail to display a context menu.
- Right-click the blank area of the thumbnail browser to display a context menu.
- Right-click and drag in the thumbnail to change the view.
- Double-click to display a larger preview window.
- Double-click the large preview to open a floating window that can be re-sized to get a higher resolution view of the preview.
This window has all the same functionality as the original preview image including the context menu and the ability to drag and drop onto other materials or objects in the model. - Right-click the large preview window or the floating preview window to display the context menu.
- Information entered to the Notes section appears in the tooltip when you mouse-over the thumbnail.
Drag and drop actions in the list section
- Drag and drop to a different position in the list to reorder.
- Drag and drop with Ctrl to a blank area to make a copy.
- Drag and drop with Alt to a blank area to make an instanced copy.
 Create New Material
Click ![]() to select an action to create a new material.
to select an action to create a new material.
 Import from material library
Imports a material (.rmtl) from the Render Content library folder.
 Create Physically Based material from texture files
Creates a physically based material from image files, or a PBR texture set (.zip).
Steps
-
Select one or more image files, or a PBR texture set (.zip).
Free or paid PBR texture sets can be downloaded from the Internet.
-
In the Texture Selection dialog, set the material name, texture assignment, texture mapping, and units.
 Custom
Creates a new custom material.
Custom materials have all possible settings available in the editor.
 Double Sided
Creates a new double sided material.
 Emission
Creates a new emission material.
 Glass
Glass
Creates a new glass material.
 Metal
Metal
Creates a new metal material.
 Paint
Paint
Creates a new paint material.
 Physically Based
Creates a new physically based material.
 Picture
Creates a new picture material.
 Plaster
Creates a new plaster material.
 Plastic
Creates a new plastic material.
 Gem
Gem
Creates a new gem material.
 More types...
Creates a new material from the Material Type Browser dialog.
The name of the material.
The type of the current material.
-
If you change a material from a type to another, the settings compatible between the current and the new material types will migrate.
Custom
The default material is white and matte, with no reflectivity or transparency.
![]() Custom Settings
Custom Settings
Color
Sets the material's base (also called diffuse) color.
-
Click the color swatch to select a color from the Select Color dialog.
Gloss finish
The Gloss finish control adjusts the highlight from matte to glossy and sets the color of the glossy area.
-
You can see Gloss finish in the Rendered display mode, but it makes no difference to Rhino Render. Some third-party renderers may use it.
-
Move the slider to change the value.
-
Double-click the slider to enter a number.
-
Click the color swatch to select a color from the Select Color dialog.
- Set the color to match the base color for metallic materials. Set the color to white for plastic materials.
Reflectivity
The Reflectivity setting sets the material's reflectivity amount and sets the reflective color.
-
Move the slider to change the value.
-
Double-click the slider to enter a number.
-
Click the color swatch to select a color from the Select Color dialog.
Transparency
Adjusts the transparency of an object in the rendered image.
-
Move the slider to change the value.
-
Double-click the slider to enter a number.
-
Click the color swatch to select a color from the Select Color dialog.
IOR (Index of Refraction)
This value defines the bending of a ray of light when it travels from a transparent material into another.
-
Click
 to bring up a list of predefined values for different materials.
Example IOR values are shown in the following table:
|
Material |
IOR |
|---|---|
| Vacuum | 1.0 |
| Air | 1.00029 |
| Ice | 1.309 |
| Water | 1.33 |
| Glass | 1.52 to 1.8 |
| Emerald | 1.57 |
| Ruby/Sapphire | 1.77 |
| Diamond | 2.417 |
Textures (images or procedural textures) can be used for color, transparency, bump, and environment.
- Images changed outside of Rhino in image editing applications automatically update in Rhino.
- Materials in the Libraries panel use texture images stored on the internet. The texture images will be downloaded to the computer when the first time they are used.
Supported image formats
Rhino supports the following file formats:
Transparency is not supported in these formats:
- JPEG - JFIF Compliant (*.jpg, *.jpeg, *.jpe)
- Windows Bitmap (*.bmp)
Transparency is supported in these formats:
- DDS files (*.dds)
- HDRi files (*.hdr, *. hdri)
- OpenEXR files (*.exr)
- Portable Network Graphics (*.png)
- Tagged Image File Format (*.tif, *.tiff)
- Truevision Targa (*.tga)
To use a texture
Click (click to assign texture) to assign a texture.
When a texture has been assigned to a setting:
- The setting is controlled by the brightness of the pixels.
- Click the texture name to edit the texture.
- Click ... to select a new texture.
- Use the checkbox to enable/disable the texture.
- Change the percentage to control the visibility (influence) of the texture.
Color
Specifies a texture to use as the material's color.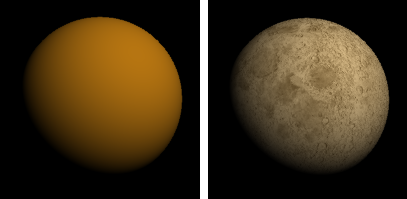
- Texture colors override mesh vertex colors. Reducing texture opacity blends texture colors with vertex colors.
Transparency
Uses a texture to control the material's transparency.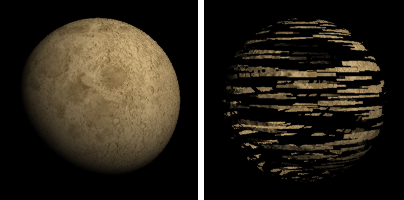
Bump / Normal
Uses a texture to control the material's bump depth or object's normal direction.
Bump and Normal maps add details to surfaces in rendering without modifying the shape of the surface.
Bump map
Uses grayscale values of a texture to make a surface appear bumpy.
Normal map
Uses RGB values of a bitmap image to alter surface normal directions.
Environment
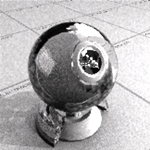
Uses a texture as the material's environment reflection.
The image should be an angular map or light probe projection (spherical) image. Other image projections will produce the reflection effect, but it will be distorted and not produce the realistic environment reflection.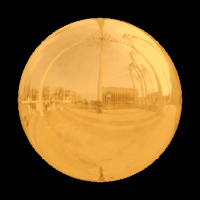
![]() Advanced Settings
Advanced Settings
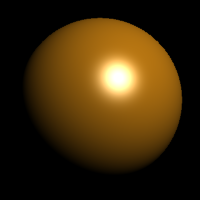
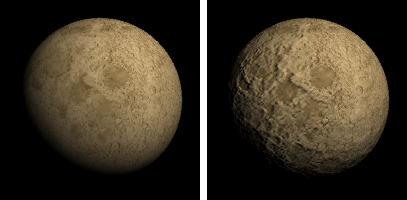
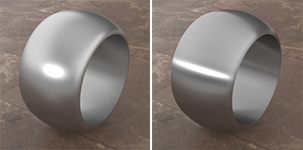
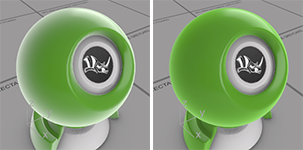
Self-illumination
Allows the material to render the diffuse color with shadowing and shading by enabling diffuse lighting.
Diffuse lighting off (left) and on (right).
On
If this setting is on, the object renders with shadowing and shading.
Off
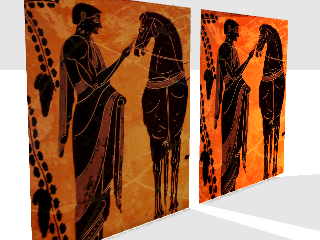
If this setting is off, the object will render the diffuse color all over with no shadowing or shading. Turning this setting off ensures that the color the texture of picture frames remains constant over the surface.
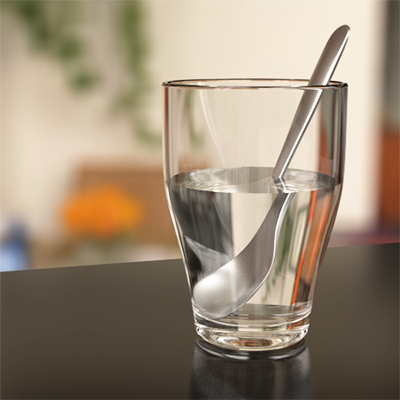
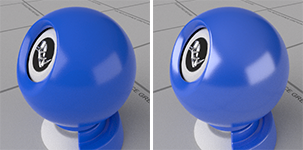
Fresnel reflectivity
Causes objects to reflect fully at glancing angles and only slightly reflect when the object is seen head on.
This effect simulates many transparent or semi-transparent materials, such as glass, plastic, and materials that have a thin transparent glaze, such as laminated paper, polished woods, and paint.
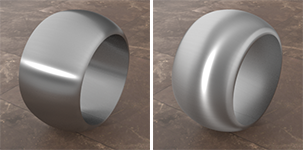
Alpha transparency
Allows images with an alpha channel for transparency to make the object transparent in the areas of the image where the alpha channel is applied.
Alpha transparency on (left) and off (right).
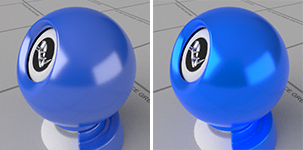
Reflection polish
Makes the surface reflections fuzzy. For surfaces that are perfectly reflective, such as mirrors and chrome, use 100% polish. Lower values model materials like certain plastics and the sanded surface of frosted glass.
Changing this setting can increase rendering time.
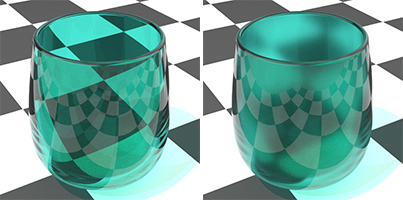
Transparent clarity
Controls the clarity of the material.
Frosted
Creates translucent materials like tracing paper or hand-made glass.
Changing this setting can increase rendering time.
Polished
Creates clear materials such as water, float glass, and diamonds.
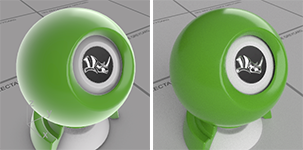
Emission color
Adds a color to the shaded result. It does not take into account the lighting, so if the emission color is white, the object will always appear white. If the emission color is gray, all parts of the object will appear brighter than they would otherwise.
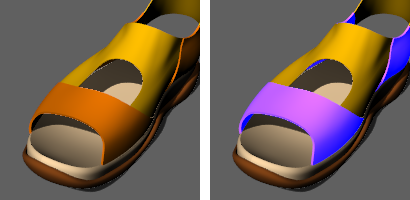
Orange material emission color black (left); emission color blue (right).
Double Sided
The Double Sided material allows to display different materials on the front and back sides of a "thin" object that does not have a physical thickness, such as a single surface or mesh.
![]() Double Sided Material
Double Sided Material
Front
The material displays on the front side of an object.
Back
The material displays on the back side of the same object.
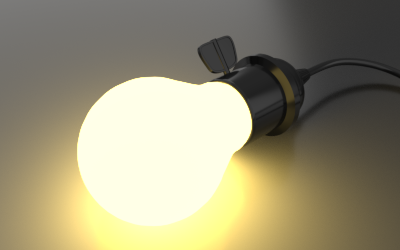
Emission
The Emission material can be assigned to an object to make the object into a lighting source.
![]() Emission
Emission
Color
The illuminating color.
-
Click the color swatch to select a color from the Select Color dialog.
Intensity
The brightness of the light.
-
Move the slider to change the value.
-
Double-click the slider to enter a number.
-
The Emission material will be rendered black when Intensity is set to 0.
Gems
The preset Gem materials offer a choice of preset gems. Other settings are pre-determined by the gem type.
![]() Gems
Gems
Type

Amber |

Amethyst |
Aquamarine |
Diamond |
Emerald |
Ruby |
Sapphire |
|
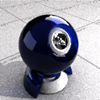
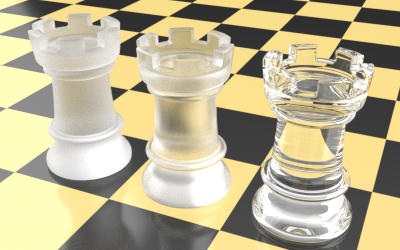
Glass
The preset Glass material type allows the Color, Frost, and index of refraction settings to be modified. Other settings are pre-determined.
Glass
![]() Glass
Glass
Color
Sets the glass color.
-
Click the color swatch to select a color from the Select Color dialog.
Clarity
Sets the transparent clearness.
-
Move the slider to change the value.
-
Double-click the slider to enter a number.
IOR
Sets the index of refraction. Details...
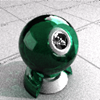
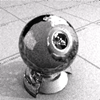
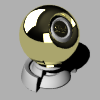
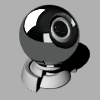
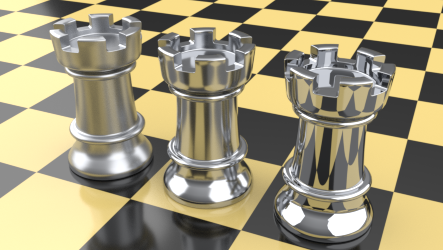
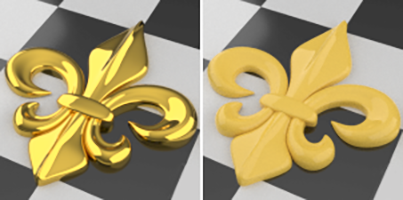
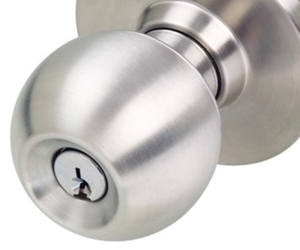
Metal
The preset Metal material allows the Color and Polish to be modified.
Other settings are pre-determined by the metal type.
Brass |
Bronze |

Chrome |
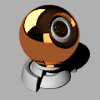
Copper |
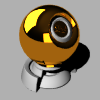
Gold |
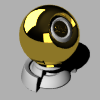
Gold (Yellow) |
Platinum |

Silver |

Stainless steel |

Steel |
Titanium |
![]() Metal
Metal
Color
Sets the metal color.
-
Click the color swatch to select a color from the Select Color dialog.
-
Some common metal colors are listed in the Select Color dialog.
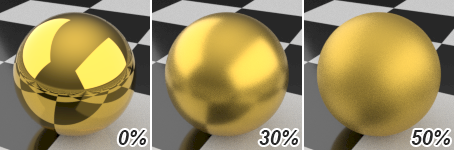
Reflection polish
Sets the reflection sharpness.
Reflection polish (left) low to high (right).
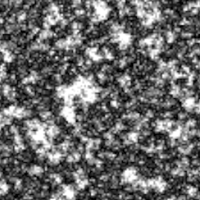
Bump texture
Sets the texture style for the bump from a limited list.
Hatch styles available
None
Hatch
Cross Hatch
Dots

Grit
Leather
Speckle
Scale
Sets the size of the bump pattern from XXXS to XXXL. You have to select an appropriate size for your model. The bump effect will not be visible in the rendering when the size is too large or too small.
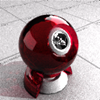
Paint
The preset Paint material allows the Color and Glossiness to be modified.
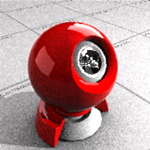
Red paint
Color
Sets the diffuse color.
Glossiness
Sets the Fresnel reflectivity and Reflection polish.
Physically Based
Physically Based Rendering (PBR) simulates interaction between lights and surfaces in the real world to create photorealistic renderings. Different material types usually use different shading methods. The physically based material type integrates several shading methods into a single material.
![]() Physically Based Material
Physically Based Material
Base color
The diffuse color of the material that displays when no texture is assigned.
-
Click the color swatch to select a color from the Select Color dialog.
Roughness
Controls the smoothness of object surface. Rough surfaces reflect light rays in a wider range of angles that make reflection blurry.
-
Move the slider to change the value.
-
Double-click the slider to enter a number.
Metallic
Enable to give the material a metal appearance.
Opacity
Controls transparency of the object.
-
Move the slider to change the value.
-
Double-click the slider to enter a number.
Move the slider towards left to increase transparency. Transparent materials increase the rendering time.
IOR
Sets the index of refraction. Details...
- The Transmission setting of ray bounces limits how many transparent objects will been seen through in the rendering.
Click this button to enable or disable shading methods.
 Add textures to current Physically Based Material
Select more image files to add to the current PBR material. The Texture Selection dialog will open for you to assign the image files to PBR material settings.
![]() Detailed settings
Detailed settings
Click Details settings to enable/disable shading methods.
When any setting has (click to assign texture), the setting can be controlled by the assigned texture.
- The checkbox enables or disables the texture.
- The percentage value controls the influence of the texture.
Base Color / Metallic / Roughness
Base Color
The diffuse color of the material that displays when no texture is assigned.
-
Click the color swatch to select a color from the Select Color dialog.
Alpha transparency
Controls transparency of the object with the bitmap texture's alpha channel.
![]()
Metallic
Gives the material a metal appearance. Details...
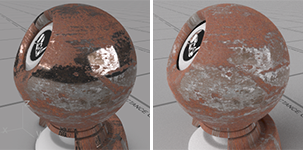
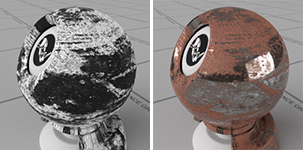
Roughness
Controls the smoothness of the material. Details...
The bitmap image for metallic texture can be used as the roughness texture, but the colors have to be inverted to add roughness to the rusted portion instead of the non-rusted portion.
Subsurface parameters control how light rays penetrate the surface of a translucent object and scatter inside the object.

Amount
Scattering Color
Scattering Radius
-
Scattering Radius is based on model units.
The specularity parameters scale the reflection highlight on non-metal objects.
F0
Scales the brightness of reflection highlight.
Tint
The amount that the specularity is tinted by the base color.
Anisotropy parameters control the aspect ratio and orientation of the specular highlight to simulate directional brushed metal materials.
Amount
Changes the aspect ratio of the specular highlight.
Rotation
Changes the angle of the specular highlight. The value can be 0 (0°) to 1.0 (360°).
- Anisotropy is UV texture space based. The specular highlight can be orientated by editing the object's texture mapping properties.
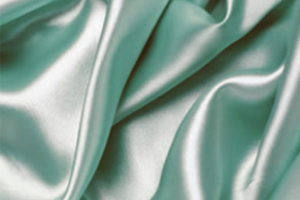
Sheen parameters mimic the rim specular effect usually seen on some fabrics like silk.
Increasing Roughness blurs the rim specular.
Amount
Controls the width of the rim specular.
Tint
The amount that the rim specular is tinted by the base color.
Clearcoat parameters simulates the highly reflective layer on top of the base paint of a car.
Amount
Controls the reflection intensity of the clear coat.
Bump / Normal
Bump uses grayscale values of a texture to make a surface appear bumpy. Normal uses RGB values of a texture to alter surface normals.
![]()
Roughness
Controls the roughness of the clear coat.
The roughness of the base paint is controlled by the base roughness setting.
Opacity parameters control the transparency of the material.
Amount
Changes the transparent level of the object.
- Refraction will take effect when the value is smaller than 1.0.
- If you want to make some part of an object completely invisible, use the Alpha texture.
IOR
Sets the index of refraction.
Roughness
Controls the roughness of refraction.
- The roughness of reflection is controlled by the base roughness setting.
Alpha
Changes visibility of the object. Reducing the alpha value also reduces refraction effect.
When the value is set to 0, the object will be completely invisible.


Emission parameters turns an object into a light source.
Color
The lighting color.
- When a texture is assigned, colors of the textures will be the lighting colors.
Multiplier
Increases or decreases the lighting intensity.
-
The material will be rendered with the base color when Multiplier is set to 0.
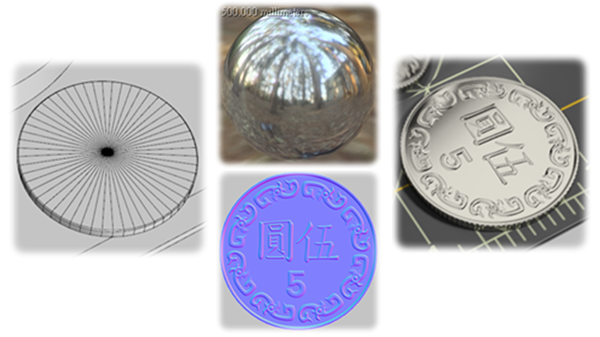
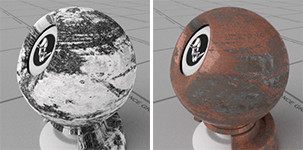
Bump / Normal and displacement
Bump / Normal and displacement parameters use textures to add details to the surface of an object.
Bump / Normal Map
A bump map uses grayscale values of a texture to make a surface appear bumpy.
A normal map uses RGB values of a bitmap image to alter surface normal directions.
Two flat cylinders (right) using a metallic material with/without the normal map (left).
Displacement Map
Displacement uses grayscale values of a texture to move an object's render mesh vertices.
-
Displacement is based on model units.
- You may need to use custom meshes in object properties to create dense enough render meshes to get a good displacement.
Ambient Occlusion parameters use a bitmap image to add fake shadows of ambient light to the object.
Ambient Occlusion Map
An ambient occlusion map is a bitmap image baked from a 3D model in a rendering to store the indirect lighting information of ambient light when the model is rendered.
Picture
Name
The name of the material.
- When an image file is dragged to a Rhino object, a Picture material is created and assigned to the object. The image file name becomes the material name.
- Tiling cannot be modified for a picture texture.
Picture
The Picture contains a simple bitmap image.
Texture
Name
The path and name of the bitmap file.
See also Bitmap Texture.
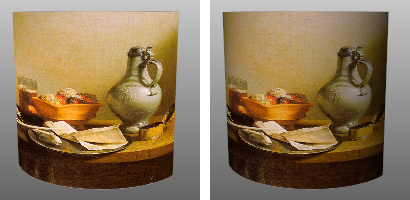
Self-illuminated
The Self-Illuminated option causes the image to always display at full intensity and is not affected by light or shadow.
Self-Illumination off (left), and on (right).
Grayscale
The Grayscale option sets the image color to 256-grey
Transparency
Specifies transparency settings for the image. Specify a transparent color to be used as an alpha channel in the case that no alpha channel is specified in the image.
Transparency is not supported when using JPEG (.jpg; .jpeg), PCX (.pcx), or Windows Bitmap (.bmp)
Use alpha channel
Specifies that the image alpha channel be used to determine transparency.
Use color mask
Specifies that a color in the image be used to determine transparency.
Color selector
Tol:
The tolerance to be used to determine if the texture's color matches the transparency color.
Object transparency
Sets the amount of transparency for the entire object.
Notes
Extra text information stored in the material that appears in the tooltip when you mouse-over the thumbnail.
Plaster
The preset Plaster material is the default matte, non-reflective, untextured material. Only the Color can be changed.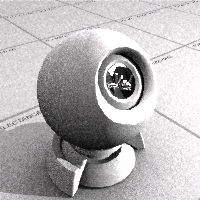
Color
Sets the diffuse color.
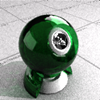
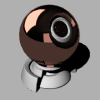
Plastic
The preset Plastic material allows the Color, Reflectivity, Polish, Transparency, and Clarity to be changed.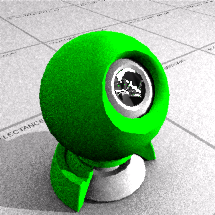
Color
Sets the diffuse Color.
Reflectivity
Sets the Reflectivity.
Transparency
Sets the Transparency.
Transparent clarity
Sets the Transparency clarity.
Bump texture
Sets the texture style for the bump from a limited list.
Hatch styles available
None
Hatch
Cross Hatch
Dots
Grit
Leather
Speckle
Scale
Sets the size of the bump pattern from XXXS to XXXL. You have to select an appropriate size for your model. The bump effect will not be visible in the rendering when the size is too large or too small.
Save and share render content
Render content (materials, environments, and textures) are stored in models. They can also be saved to files and shared across models. The Libraries panel displays the default content folder. Content can be dragged and dropped between Rhino sessions or between a Rhino window and a disk folder.
To access hidden command-line options
- Type a hyphen in front of the command name: -Materials.
| Command-line options | |
|---|---|
|
ShowPanel=Yes / No / Toggle |
Displays the Materials panel. |
|
Options |
Displays command-line options. AddDeleteRenameChangeDuplicateLoadFromFileSaveToFileAssignToObjects |
See also

Snapshots
The Snapshots command saves and restores Named Views, Named Positions, Layer States, as well as rendering settings, object settings including locked/hidden state, display mode, material, position, light settings, curve piping, displacement, edge softening, shutlining, and thickness.
Resolving render content conflicts
Rhino detects material, environment and texture name conflicts in the following file operations:
- Import a model.
- Insert a model.
- Paste objects from a different model
- Attach or activate a worksession model.
When a render content item name already exists in the current model, but the content settings are different, the conflicted items will be resolved based on the related advanced settings.
Search for PasteConflictOption (for paste) and ImportRenameConflictingEx (for import and insert) in Advanced settings and change the value as described below.
0 = Do not import incoming conflicted render contents.
1 = Import and rename incoming conflicted render contents with [imported] post-fix.
2 = Import incoming conflicted render contents and overwrite existing ones.
3 = Pop up the Render Content Name Conflict dialog and let you decide how to resolve the conflicts.
Materials and texture mapping in Rhino for Windows
|
Toolbar |
Menu |
|---|---|
|
|
|

The RenderAssignMaterialToObjects command assigns a material to the selected objects from the command-line.
Steps
-
Select one or more objects.
-
Select a material by entering its name or ID.
Command-line options
PerFaceMaterials
When the selected object has materials assigned to sub-faces:
Keep assigns the material to the object and keeps existing per-face materials.
Remove assigns the material to the object and removes per-face materials.
Ask shows a dialog box to let you decide what to do.
RecurseIntoBlocks
When a block instance is selected:
Yes assigns the material to the objects in the block instance.
No assigns the material to the block instance.
Ask shows a dialog box to let you decide what to do.
See also
RenderAssignMaterialToLayer
Assigns a material to a layer from the command-line.
RenderAssignMaterialToLayersOfObjects
Assigns a material to the selected object's layer from the command-line.