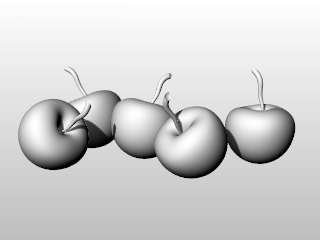
Render 指令旨在以目前的渲染器在另一个视窗渲染模型。
附注
| ● | 物件的渲染颜色可以从材质编辑器里的材质、物件的属性或物件所属的图层设定。 |
| ● | 如果您要渲染的物件非常复杂,第一次渲染时 Rhino 可能需要一些时间产生渲染网格,下次渲染时 Rhino 就不需要再次产生渲染网格,所以速度会快一点。 |
除着色预览以外,Rhino 提供包括色彩、灯光、透明度、阴影、贴图以及凹凸贴图等要素的完整渲染功能。
在您为物件定义颜色、高光、贴图、透明度、凹凸等属性之前,渲染物件将呈现白色。这些属性可以通过属性面板的材质页面来定义。

基本的模型渲染有四个步骤:
| ● | 加入照明 |
| ● | 赋予材质 |
| ● | Render |
前三个步骤并没有绝对的先后顺序,您必需持续调整这三个步骤的设定,不断渲染测试,直到得到自己觉得满意的结果。
In every Rhino rendering there are light sources that Rhino uses to calculate how the objects are to be illuminated. If you do not add any light sources to your scene, the default light is used. The default light is a directional light with parallel rays that acts as though you have a lamp shining over your left shoulder.

![]() Add indoor lights
Add indoor lights
| 4 | Insert Spotlights, Directional Lights, Linear Lights, Point Lights, or Rectangular Lights. |
Materials specify the color, finish, transparency, texture, and bump for use by the renderer.

![]() 赋予给图层
赋予给图层
| 4 | From the Material Editor, drag a material onto a layer. |
![]() Assign materials to objects
Assign materials to objects
| 1. | Select an object. |
| 2. | 从编辑 功能表,选择物件属性。 |
| 3. | In the Properties panel, under Material, click Assign by, and then click Object. |
| 4. | 点击 建立物件材质属性。 |
渲染并保存图像
![]() Render and save the image
Render and save the image
| 1. | 从渲染 功能表,选择渲染。 |
| 2. | 在渲染工作视窗 文件列表中,选择另存为. |
The CopyRenderWindowToClipboard command copies the image in the render window to the Windows Clipboard.
The RenderInWindow command renders a selected area of the current viewport in the render window at viewport resolution.
RenderPreview 指令在渲染视窗以较快但较粗糙的品质渲染目前的工作视窗。
RenderPreviewInWindow 指令以较粗糙的品质及较少的时间,将目前的工作视窗中框选的区域在渲染视窗渲染。
RenderPreviewWindow 指令以较粗糙的品质及较少的时间,在目前的工作视窗中渲染框选的区域。
The RenderWindow command renders a selected area of the current viewport in the viewport at viewport resolution.
请参考