使用MaterialEditor 指令打开材质面板,在使用 Rhino 默认渲染器时,可以通过材质面板来设置颜色、透明度、凹凸、贴图等。
附注
| ● | 材质可以直接拖放至材质、贴图与环境的设定。 |
| ● | 3dm 文件里可以储存无数量限制的材质,材质与环境都可以加入贴图,设定材质与环境时都有缩图可以预览。 |
| ● | 材质编辑器、贴图面板、环境编辑器的任何颜色方块都可以相互拖放。 |
材质面板有附加的浏览工具。
![]() Back
Back
选取上一个选取的材质。
![]() 向前
向前
选取下一个选取的材质。
![]() Currently selected item name
Currently selected item name
显示目前材质的图示与名称。
![]() Menu
Menu
显示工具功能表。
![]() 说明
说明
| 4 | 按鼠标右键可以弹出快显功能表。 |
| 4 | 右键点击缩略图浏览窗口中的空白部分将弹出快显功能表。 |
| 4 | 以鼠标右键在缩略图上点击并拖曳可以更改视图。 |
| 4 | 双击可以显示预览面板。 |
| 4 | 拖拽预览缩略图可以重排列表。 |
| 4 | 双击预览面板里的大型缩图可以打开浮动预览缩图小视窗。 浮动预览缩图小视窗里的缩图与原来的缩图可以使用的功能完全一样,例如:可以直接拖放到工作视窗里的物件赋予材质。 |
| 4 | 鼠标右键点击大型预览缩略图或浮动预览缩略图都可以弹出快显功能表。 |
将一个材质赋予到物件。
| 1. | 在工具 |
| 2. | 在 Rhino 工作视窗,选取目标物件。 |
赋予给预选物件
| 1. | 在 Rhino 工作视窗,选取目标物件。 |
| 2. | 在工具 |
拖放材质至物件
| 4 | 将材质的预览缩图拖放至目标物件。 |
将选取的材质赋予给选取的图层。
| 1. | 在工具 |
| 2. | 在选择图层对话框勾选要赋予材质的图层。 |
赋予材质给选取物件的图层
| 1. | 在工具 |
| 2. | 在 Rhino 工作视窗,选取目标物件。 |
Names the texture. All textures are automatically assigned a name. You can change this generic name.
附注: 直接将贴图或图片文件拖放至 Rhino 物件会通过该图片自动建立一个新材质。
所有的材质都有的基本设定,预设的材质的颜色是白色,光泽度、反射度、透明度都为 0。
颜色设定材质的基底颜色 (又称为漫射颜色)。
用于渲染曲面、多重曲面与网格的颜色。
这里的颜色设定不会影响物件的框线颜色,要改变物件框线的颜色可以在物件所属的图层或物件的属性设定。
Note: You can drag the color swatch to a folder to create a Rhino color file.
To add this color to a color library
| 4 | Drag it from a folder to another color swatch in the Material, Environment, or Texture Palette panels, or you can drag it onto an object. |
光泽度调整材质反光的锐利度 (平光至亮光)。
To change the glossiness ![]()
| 4 | 向右移动滑杆提高光泽度。
|
To set the gloss finish color ![]()
| 4 | 按光泽度的颜色方块设定光泽的颜色。
|
附注:金属材质的光泽度颜色与金属的颜色相同,塑胶材质的光泽度颜色为白色。
反射度设置设定材质的反射度。
To change the reflectivity amount ![]()
| 4 | 向右移动滑杆提高反射度。 |
To change the reflectivity color ![]()
| 4 | 按反射度的颜色方块设定反射的颜色。 |
调整物件在渲染影像里的透明度。
贴图
材质的颜色、透明、凹凸与环境可以用图片或程序贴图代入。
附注:材质使用的外部图片经过类似 Photoshop 的绘图软体修改后 Rhino 里物件的材质贴图会自动更新。
Supported image formats
| ● | DDS files (*.dds) |
| ● | HDRi files (*.hdr, *. hdri) |
| ● | JPEG - JFIF Compliant (*.jpg, *.jpeg, *.jpe) |
| ● | OpenEXR files (*.exr) |
| ● | Portable Network Graphics (*.png) |
| ● | Tagged Image File Format (*.tif, *.tiff) |
| ● | Truevision Targa (*.tga) |
| ● | Windows Bitmap (*.bmp) |
选取一张图片
| 1. | 点击贴图控制。 |
第一次操作时选框会被自动勾选,您可以取消勾选关闭赋予的贴图。
| 2. | 选取一个图片文件。 |
| 3. | 以百分比数值栏位调整贴图作为颜色、透明度、凹凸或环境的强度。 |
以贴图做为材质的颜色。
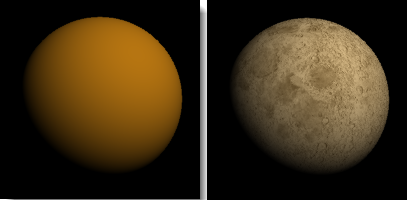
以贴图的灰阶深度设定物件的透明度。
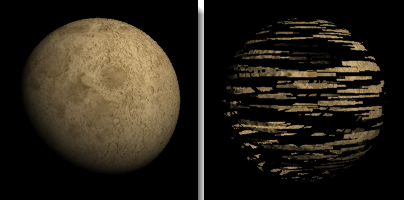
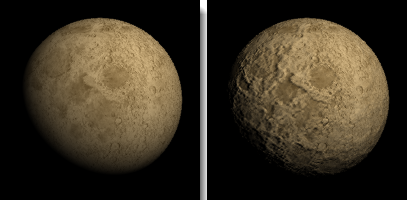
以贴图的灰阶深度设定物件渲染时的凹凸效果。
这里记录的是渲染场景时要作为凹凸贴图使用的图片文件的文件名。
凹凸贴图只是视觉上的效果,物件的型状不会改变。
设定材质假反射使用的环境贴图,非光线追踪的反射计算。
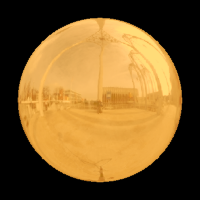
附注:这里使用的贴图必需是全景贴图或金属球反射类型的贴图。其他的图片可以产生反射效果,但是不会产生真实的环境反射效果。
Notes
Add notes to provide extra information. The notes are saved with the model and appear as tooltips in the Library, Material, Environment, and Texture panels when you mouse-over the thumbnails.
The Material Editor contains two external material libraries: Custom materials and Standard materials, and an internal list of Model Materials. Your own custom materials are stored either in the Custom materials library or in the Model Materials.
When materials are assigned to objects or layers, they are added to the Model Materials.
拖放材质至物件
| 4 | Drag the material from the Standard materials, Custom materials or Model materials onto the target objects. |
附注
| ● | If you pre-select a group, then drop a material onto the group, the material is applied to the whole group. |
| ● | With no pre-selection, dropping a material onto an object in a group applies the material only to the selected object. |
To drag and drop materials to layers
| 4 | Drag the material from the Standard materials, Custom materials or Model materials onto a target layer in the Layer panel. |
附注:拖放的方式一次只能赋予一个图层材质。
Materials can only be added to the Custom materials library or the Model Materials. The Standard materials library cannot be edited. The materials are stored in the application and will be replaced when Rhino is updated.
Custom materials library
Custom materials are stored in an external Rhino material (.rmtl) file. These materials can be used in any model.
Custom materials library context menu actions
| 4 | In the Custom materials library, right-click a thumbnail to display a context menu. |
Options
Edit library material
Make changes to the custom material.
Duplicate material
Make a copy of the custom material.
Show in Finder
Open the Finder application at the custom material (.rmtl) file.
Move to Trash
Delete the custom material.
创建一个新材质
| 4 | In the Custom materials library or the Model Materials, click the Add material button  . . A new matte white material is created. |
To copy materials
| 1. | Drag materials from the Standard materials library to the Custom materials library or to the Model Materials. |
| 2. | Drag materials from the Model Materials to the Custom materials library to store them in an external file that can be used by other models. 或 |
| 4 | Right-click a material in the Custom materials library or the Model Materials, and on the menu, click Duplicate material. |
Model Materials
Model materials are stored in the model, not in an external file. Other models do not have access to these materials. They are added to your model when you create or copy a material in the Model Materials, or when you insert or import another model that has materials assigned to objects or layers.
Model materials library context menu actions
| 4 | In the Model materials library, right-click a thumbnail to display a context menu. |
Options
Select objects using this material
Select all objects in the model that have this material assigned.
Duplicate material
Create a copy of the material in the custom library.
Standard materials library
Standard materials library context menu actions
| 4 | In the Standard materials library, right-click a thumbnail to display a context menu. |
Options
Show material details
Displays the material properties.
To edit a material
| 4 | In the Custom material library or Model Materials, click a material thumbnail. The material properties editor appears. |
Material name
Names the material.
颜色设定材质的基底颜色 (又称为漫射颜色)。
用于渲染曲面、多重曲面与网格的颜色。
这里的颜色设定不会影响物件的框线颜色,要改变物件框线的颜色可以在物件所属的图层或物件的属性设定。
更改颜色
| 4 | Click the color swatch to select a color from the Colors dialog box. |
光泽度调整材质反光的锐利度 (平光至亮光)。
To change the glossiness
| 4 | 向右移动滑杆提高光泽度。
|
To set the gloss finish color
| 4 | 按光泽度的颜色方块设定光泽的颜色。
|
附注:金属材质的光泽度颜色与金属的颜色相同,塑胶材质的光泽度颜色为白色。
调整物件在渲染影像里的透明度。
To set the transparency value
| 4 | 向右移动滑杆提高透明度。 |
设定光线通过透明的物件时方向转折的量。
以下是一些材质的折射率:
| 材质 | 折射率 |
|---|---|
| 真空 | 1.0 |
| 空气 | 1.00029 |
| 冰块 | 1.309 |
| 水 | 1.33 |
| 玻璃 | 1.52 至 1.8 |
| 绿宝石 | 1.57 |
| 红宝石/蓝宝石 | 1.77 |
| 钻石 | 2.417 |
反射度设置设定材质的反射度。
To change the reflectivity amount
| 4 | 向右移动滑杆提高反射度。 |
To change the reflectivity color
| 4 | 按反射度的颜色方块设定反射的颜色。 |
材质的颜色、透明、凹凸与环境可以用图片或程序贴图代入。
附注:材质使用的外部图片经过类似 Photoshop 的绘图软体修改后 Rhino 里物件的材质贴图会自动更新。
Supported image formats
| ● | DDS files (*.dds) |
| ● | HDRi files (*.hdr, *. hdri) |
| ● | JPEG - JFIF Compliant (*.jpg, *.jpeg, *.jpe) |
| ● | OpenEXR files (*.exr) |
| ● | Portable Network Graphics (*.png) |
| ● | Tagged Image File Format (*.tif, *.tiff) |
| ● | Truevision Targa (*.tga) |
| ● | Windows Bitmap (*.bmp) |
选取一张图片
| 1. | Click to open the texture control. |
| 2. | Click the texture checkbox to turn on the texture. Clear the checkbox to turn off the assignment. |
| 3. | 选取一个图片文件。 |
| 4. | Specify the percentage of strength the image will use to affect the color, transparency, bump, or environment. |
Each of the texture options: color, transparency, bump, and environment includes the components that control how the image interacts with the object.
以贴图做为材质的颜色。

以贴图的灰阶深度设定物件的透明度。

以贴图的灰阶深度设定物件渲染时的凹凸效果。
这里记录的是渲染场景时要作为凹凸贴图使用的图片文件的文件名。
凹凸贴图只是视觉上的效果,物件的型状不会改变。

设定材质假反射使用的环境贴图,非光线追踪的反射计算。

附注:这里使用的贴图必需是全景贴图或金属球反射类型的贴图。其他的图片可以产生反射效果,但是不会产生真实的环境反射效果。
Component options
Map file
Select the image to use for the component color, transparency, bump, or environment.
强度
Specify the percentage of strength the image will use to affect the color component.
过滤器 
When multiple points on the surface are mapped to the same point in the texture the image can be "pixelated," displaying jagged lines and stair-stepped transitions between colors in the texture. Filtering smooths those transitions. In most cases the pixelation is smoothed out but if a very small texture is mapped to a very large surface the filtering tends to make things look blurry.
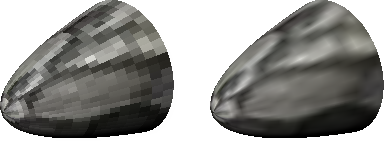
开启过滤 (左);关闭过滤 (右)。
Tiling
U/V
Specifies how many instances of the texture will be placed on objects in the u- and v‑directions.
Offset
U/V
Specifies the u‑ and v‑distance from zero that the texture will be offset.
进阶设定
Adds a color to the shaded result. It does not take into account the lighting, so if the emission color is white, the object will always appear white. If the emission color is gray, all parts of the object will appear brighter than they would otherwise.
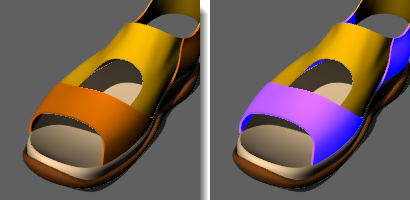
橘色的材质以黑色 (左) 与蓝色 (右) 做为发光颜色。
设置物件背后环境的颜色,物件背光面与阴影中也会出现少许。
这个设定未启用时物件没有着色的明暗效果。以 PictureFrame 指立建立的帧平面使用的材质这个设定是关闭的。
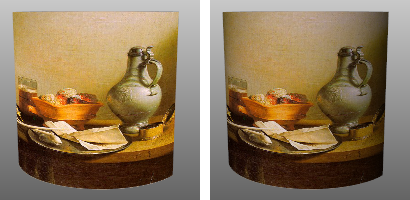
橘色的材质打开 (左) 与关闭 (右) 漫射照明。
指令行选项
进入指令行选项
| 4 | Type a hyphen in front of the command name: -MaterialEditor. |
显示面板
Displays the Material Editor panel.
Options
显示命令行选项。
Add
删除
Rename
更改
Duplicate
从文件载入
保存到文件
请参考