![]()
Render
Render
| Toolbar | Menu |
|---|---|
|
|
Render Render |
The Render command renders the model using the current renderer producing a color image in a separate display window.
In addition to shaded previews, Rhino provides full-color rendering with lights, transparency, shadows, textures, and bump mapping.
Objects will render white until you add render color, highlight, texture, transparency, and bumps. These attributes are controlled through the Properties panel, Material page.
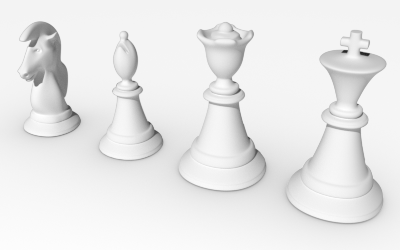
The process needed to render scenes consists of four basic steps:
Set up the environment and ground plane
Add lighting
Assign materials
Render
Although the steps do not have to be done in this order, using this method seems to make setting up a scene more efficient. To improve quality, repeat these steps until the image looks right to you.
In every Rhino rendering there are light sources that Rhino uses to calculate how the objects are to be illuminated. If you do not add any light sources to your scene, the default light is used. The default light is a directional light with parallel rays that acts as though you have a lamp shining over your left shoulder.
Materials specify the color, finish, transparency, texture, and bump for use by the renderer.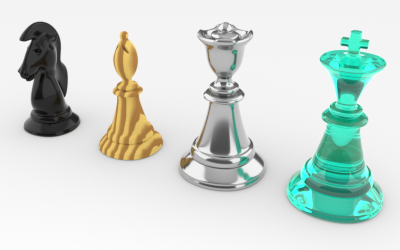
In the Layer Material dialog, select or create a material.
Type a letter to navigate to the first material in the list with a name starting with the letter.
The ground plane provides an infinite horizontal platform for the image that stretches to the horizon in all directions positioned at a defined elevation. A ground plane renders much faster than using a surface as a background. Any material can be assigned to the ground plane.
Environments describe the space around the model. This space is reflected in objects and can provide overall lighting.

The rendering properties include environment settings like background color and image.
Render and save an image.
In the Render, on the menu bar, select Rhino > Save as.
| Toolbar | Menu |
|---|---|
|
|
|
The RenderArctic command sets everything to white - materials, skylighting, ground plane and renders the current viewport.
| Command-line options | |
|---|---|
| AffectMaterials | Turn off to exclude materials from the settings. |
| AffectLights | Turn off to exclude lights from the settings. |
| AffectGroundPlane | Turn off to exclude groundplane from the settings. |
| AffectBackground | Turn off to exclude background from the settings. |
See: Wikipedia: Ambient occlusion.
| Toolbar | Menu |
|---|---|
|
|
|
The CloseRenderWindow command closes the render display window.
This is useful for doing multiple renderings. When combined with the SaveRenderWindowAs command, you can create multiple renderings and save them to different files from your script.
| Toolbar | Menu |
|---|---|
|
|
|
The CopyRenderWindowToClipboard command copies the image in the render window to the Clipboard.
| Toolbar | Menu |
|---|---|
|
|
|
The RenderBlowup command renders a selected area of the current viewport in the render window at the resolution specified in the Rendering panel.
| Toolbar | Menu |
|---|---|
|
|
|
The RenderInWindow command renders a selected area of the current viewport in the render window at viewport resolution.
| Toolbar | Menu | Panel Gear Menu |
|---|---|---|
|
|
Window Floating Panels > Show Rendering Panel |
Rendering |
The Rendering command opens the Rendering panel that provides quick access to the Render Document Properties.
Sets the current renderer. This can be the built-in Rhino Render or a plug-in.
Specify a source for the view.
Renders the current viewport.
Select a viewport to render from the list.
Select a named view to render from the list.
Select a snapshot to render from the list.
The aspect ratio displays to the right of the menu.
Renders the active viewport the active viewport using the pixel size of the viewport.
Renders the active viewport using the custom resolution. Type the custom width and height resolution in pixels.
Renders the active viewport the selected pixel resolution.
If you add a text file named render_sizes.txt to the folder where the Rhino executable (.exe) resides, Rhino Render and some other renderers will read this text file for custom render sizes.
Maintains the aspect ratio of the viewport. When the height or width is changed, the other dimension changes in relation.
Calculates the size of the image in the selected unit system based on the Resolution and DPI ("dots" per inch) settings. This is useful for determining the size of the image for printing.
Sets the image size in pixels, inches, millimeters, or centimeters.
Image pixels ("dots") per inch.
The Quality settings help to improve:
Higher quality settings result in more rays being cast per pixel, and as a result the rendering time will increase. Prefer lower quality settings when setting up your scene, but higher settings when producing a final image for presentation purposes.
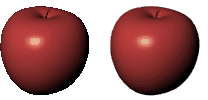
Rhino calculates each pixel in the rendered image by averaging several samples. This makes the image appear smoother, but also slows down rendering.
The backdrop is what you see directly in front of the camera if there are no objects in the way. The background is not 3‑D — it exists only on the screen.
Displays a solid color.
Displays a two-color gradient. The color for the top of the image background is the Solid color set above.
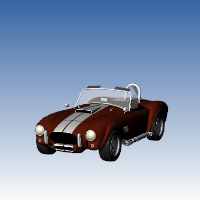
Displays the portion of the current environment that the camera sees in the viewport.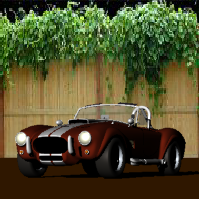
Creates a new environment using a template from the library.
Edits the selected environment.
See: Environment Editor.
Copies the selected environment to a new environment with the same settings.
Displays the current viewport wallpaper.

Fits the wallpaper to the rendered view.
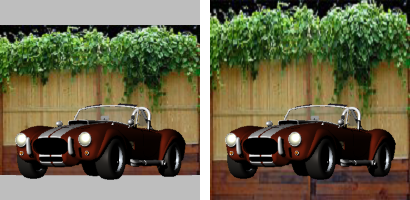
The background is rendered with an alpha channel for transparency. The image must be saved to a file format that supports alpha channel transparency (.png, .tga, .tif).
Turns on the ground plane.
Opens the Ground Plane panel.
Assigns a custom environment that will be reflected by objects in the scene.
Creates a new environment using a template from the library.
Edits the selected environment.
See: Environment Editor.
Copies the selected environment to a new environment with the same settings.
The No environment setting applies a plain gray background.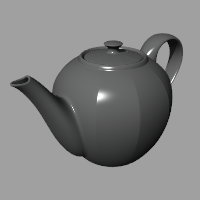
The Studio environment offers soft lighting provided by a high-dynamic range image.
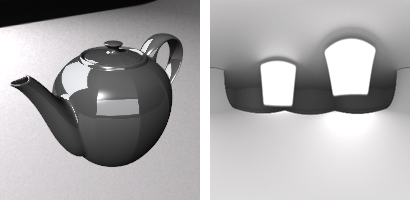
Turns on the sun.
Opens the Sun panel.
Turns on skylight.

Adjusts the skylight intensity.
Sets an environment that is used as sky light.
Creates a new environment using a template from the library.
Edits the selected environment.
See: Environment Editor.
Copies the selected environment to a new environment with the same settings.
Opens the Lights panel.
Controls whether or not spotlights that are on hidden layers or that are hidden with the Hide command are rendered.
 Snapshots
The Snapshots command saves and restores Named Views, Named Positions, Layer States, as well as rendering settings, object settings including locked/hidden state, display mode, material, position, light settings, curve piping, displacement, edge softening, shutlining, and thickness.
Curve objects are rendered with the surfaces.
Surface isoparametric curves and edges are rendered with the surfaces. Edge thickness set in the Rendered viewport apply.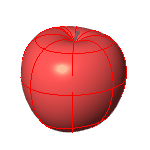
Dimensions and texts are rendered with the surfaces.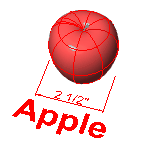
 Snapshots
The Snapshots command saves and restores Named Views, Named Positions, Layer States, as well as rendering settings, object settings including locked/hidden state, display mode, material, position, light settings, curve piping, displacement, edge softening, shutlining, and thickness.
The rendered image is usually produced at a higher color depth than monitors and low-dynamic-range file types like bitmaps like JPEG, PNG, BMP can reproduce. The most important effect this causes is banding, which is a quantization error. Dithering reduces quantization errors and so gets rid of banding.
Both dithering methods, generally do the same thing. Sometimes, one might be better than the other, but in general, Simple Noise is the best.
See: Wikipedia: Dither.
No dithering.
The algorithm achieves dithering by diffusing the quantization error of a pixel to its neighboring pixels.
See: Wikipedia: Floyd-Steinberg dithering.
A random variation of brightness or color information in images.
See: Wikipedia: Image noise.
Image files are color corrected so that they can be loaded byte-by-byte into the RGB pixels of a computer screen and look right on a monitor. This means that the color response of a standard image is non-linear, that is, it is gamma corrected. Gamma refers to the power function that is used to correct the image.
The Gamma value changes, and therefore corrects the output of the image.
See: Wikipedia: Gamma correction.
The Rendered display mode supports a linear workflow for accurate color, gamma and lighting computation.
Gamma correction for bitmap images that are loaded from disk is removed (by the inverse of the amount in the Gamma edit box) so that they have a linear response before they are passed to the renderer. The renderer renders them in this uncorrected state. The gamma correction is applied to the entire finished image. This can do a better job of processing the color in rendered images.
 Snapshots
The Snapshots command saves and restores Named Views, Named Positions, Layer States, as well as rendering settings, object settings including locked/hidden state, display mode, material, position, light settings, curve piping, displacement, edge softening, shutlining, and thickness.
The width and height of each grid cell in pixels.
The smaller the grid cell size, the more memory it takes and the more memory it takes to build, but the faster the final render.
The shadow ray is the ray shot from the scene towards each light when the intersection between the eye ray and the scene is found. Usually the lions share of the render time is spent tracing the shadow rays.
To increase calculation speed for the spotlight shadow rays, the render plug-in divides the spotlight cone into rectangular regions, and again builds a sorted list of the objects within each region. This speed increase only applies to spotlights, because they are very similar to the viewports, the light location is like the camera location, and the light cone defines the viewport.
The spotlight grid is defined in number of grid cells instead of pixels, because there is no pixel size associated with lights.
Prevents self-shadowing artifacts. When the intersection between the eye ray and the scene is found, the intersection point is moved (offset) towards each light before calculating the shadow ray. The reason is there's always some numerical fuzz in calculating the intersections, and if the point is not offset, the shadow ray might hit the very same polygon again, putting shadows in wrong places. You can see the self shadowing artifacts if you set the setting to zero, and then render the scene.
The amount of offset.
A binary space partitioning (BSP) tree is another way to increase rendering speed. Instead of testing each polygon one-by-one, the objects and polygons are divided into a tree-like hierarchy based on the location in space.
The renderer builds multiple trees, one that contains the whole object bounding boxes, and one per object that contains the polygons for that object.
The BSP tree takes some time to build and takes some memory. A deeper tree may take longer to build, but may render faster. A shallow tree is faster to build, but may take a long time to render.
Controls how many times the scene can be subdivided when building the tree.
The tree depth defaults to Auto, and node size to 1. There should be no need to change these settings unless you render a scene that is so huge that Rhino runs out of memory using the default settings.
Defines the optimal size for each node that contains the objects or polygons.
The transparency bounces setting controls how many times rays that hit transparent objects are traced: 12 means a stack of 12 transparent sheets will render properly, but the 13th sheet will render opaque. To keep the render times reasonable, the limit is 15.
The reflectivity bounces setting controls how many times rays that hit reflective objects are traced. To keep the render times reasonable, the limit is 15.
Restores all default rendering settings.
Renders the current model.
| Toolbar | Menu |
|---|---|
|
|
The RenderOpenLastRendering command opens the last rendering image file (.rimage).
| Toolbar | Menu |
|---|---|
|
|
|
The RenderOpenRenderImage command opens a browser window with the recent rendering image files (.rimage).
| Toolbar | Menu |
|---|---|
|
|
Render Render Preview |
The RenderPreview command renders the current viewport in the render window at render resolution, optimizing render time.
| Toolbar | Menu |
|---|---|
|
|
|
The RenderPreviewInWindow command renders a selected area of the current viewport in the render window at render resolution, optimizing render time.
| Toolbar | Menu |
|---|---|
|
|
|
The RenderPreviewWindow command renders a selected area of the current viewport in the viewport at viewport resolution, optimizing render time.
| Toolbar | Menu |
|---|---|
|
|
|
The RenderReportMissingImageFiles command opens the image manager, which can be switched to show all image files in addition to missing ones.
| Toolbar | Menu |
|---|---|
|
|
|
The RenderWindow command renders a selected area of the current viewport in the viewport at viewport resolution.
| Toolbar | Menu |
|---|---|
|
|
|
The SaveRenderWindowAs command saves the image in the render window to a file.
| Toolbar | Menu |
|---|---|
|
|
Render Current Render |
The SetCurrentRenderPlugIn command specifies the current rendering plug-in application.
You can download plug-ins from www.rhino3d.com/resources.
Rhino 6 for Mac © 2010-2020 Robert McNeel & Associates. 11-Nov-2020