The EnvironmentEditor command environments describe the space around the model.
The Environments panel has additional browsing tools.
![]() Back
Back
Walks back though the previously selected environments.
![]() Forward
Forward
Walks forward through the previously selected environments.
![]() Currently selected item name
Currently selected item name
Displays the current environments icon and name.
![]() Menu
Menu
Displays the Tools menu.
![]() Help
Help
Right-click a thumbnail to display a context menu.
Right-click the blank area of the thumbnail browser to display a context menu.
Right-click and drag in the thumbnail to change the view.
Double-click to display a larger preview window.
Drag the preview thumbnails to reorder the list.
Double-click the large preview to open a floating window that can be re-sized to get a higher resolution view of the preview.
This window has all the same functionality as the original preview image including the context menu and the ability to drag and drop onto other materials or objects in the model.
Right-click the large preview window or the floating preview window to display the context menu.
To create a new environment
| 1. | In the thumbnail browser, click the Create New Environment button |
| 2. | In the Open dialog box, select an environment type, or click More types.
|
Types
Start from scratch
Provides templates for materials.
![]() Load from file
Load from file
Imports environments from a saved Rhino .renv file.
![]() Basic Environment
Basic Environment
Creates a new basic environment.
Start from existing
Displays the environments in the model to use as templates.
 Make a copy
Copies the environment into a new independent environment.
 Share all settings
Copies the environment with shared settings. Changes to one environment's settings changes both environments.
 Show tree view
Displays the environments in a tree showing relationships between environments.
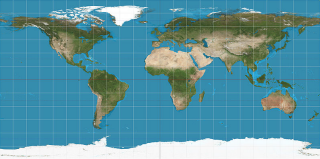
The basic environment is a simple background color and optional texture. The projection of the texture can be set to either planar, spherical (otherwise known as equirectangular or longitude/latitude) or box.
To set the background color
Select the color for the environment background.
Note: You can drag the color swatch to a folder to create a Rhino color file.
To add this color to a color library
Drag it from a folder to another color swatch in the Material, Environment, or Texture Palette panels, or you can drag it onto an object.
Background image
Uses an image as the environment background.
To specify an image
| 1. | Click the texture control.
The check box automatically becomes checked the first time you do this. You can clear the check box to turn off the assignment. |
| 2. | Select an image file to use. |
Sets the projection style for the background image.
Planar
Maps texture directly to background. Environment looks always the same no matter where the camera is looking.
Light probe
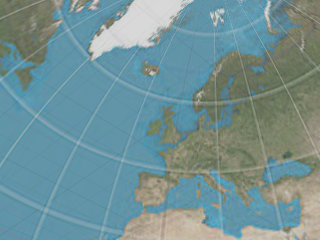
Also known as angular fish-eye projection or azimuthal equidistant projection. Elliptical subsection reaching each border of the texture is mapped onto the sphere.
Equirectangular
Also known as spherical projection. Horizontal line in the middle of the texture is mapped to the equator of the sphere.


Cubemap
Subsections corresponding to each side of the cube are located side by side dividing the texture into six equal parts.
See: Wikipedia: Cube mapping.
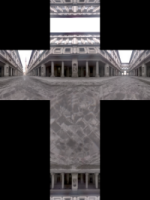
Vertical cross cubemap
Subsections corresponding to each side of the cube are located in a vertical cross pattern. Each subsection is one fourth of the image in height and one third in width.

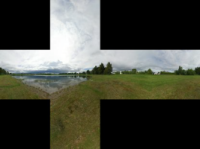
Horizontal cross cubemap
Subsections corresponding to each side of the cube are located in a horizontal cross pattern. Each subsection is one third of the image in height and one fourth in width.

Emap
Elliptical subsection reaching each border of the texture is mapped onto the sphere. This projection is the result of taking a photo of a mirror sphere with an orthographic camera.
Hemispherical
Like spherical projection but the entire texture is mapped onto the upper half of the sphere. The bottom border of the texture is stretched over the under side of the sphere.
Notes
Allows notes for the environment.
Materials, environments, and textures are stored in the model, but render content can also be saved to files that can be shared between models. Content can be dragged between Rhino sessions and into a folder.
Color swatches can be dragged and dropped in the same way.
The Libraries panel displays the default content folder. Use this to drag and drop content into the model or to drag and drop model content to an external file.
Command-line options
To access command-line options
Type a hyphen in front of the command name: -EnvironmentEditor.
ShowPanel
Displays the Environment Editor panel.
Options
Displays command-line options.
Add
Delete
Rename
Change
Duplicate
LoadFromFile
SaveToFile
See also
Open the Material Editor to manage materials in the model.
Open the Texture Editor.
Render the objects using the current renderer.
Rhinoceros 5 © 2010-2015 Robert McNeel & Associates. 17-Sep-2015