Picture
| Toolbar | Menu |
|---|---|
|
|
Surface Plane > Picture |
The Picture command draws a rectangular planar surface with the specified image assigned to its material and sets the object to Rendered display mode similar to using the SetObjectDisplayMode command.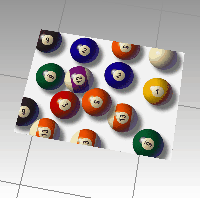
Steps
-
Select one of the supported image file types.
Or, press Command+V if there is an image stored in Clipboard.
-
Pick the first corner of the plane.
-
Pick the other corner, or type the length.
The defining rectangle retains the same aspect (length to width) ratio as the image.
-
Isocurves and edges are turned off on picture objects in all display modes.
-
A Picture material will be created that can be edited in the Materials panel.
-
When a Picture plane is split and shrunk, a new material will be added for each new Picture plane. The goal is to make the texture display consistent.

Command-line options
(Default)
Draws the rectangle using two opposite corners.
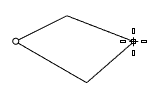
3Point
Draws the rectangle using two adjacent corner locations and a location on the opposite side.
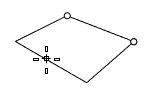
EdgeMidpoint
Draws the rectangle from the midpoint of the first edge, an end of the edge, and a location on the opposite side.
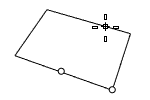
Vertical
Draws the rectangle perpendicular to the construction plane.
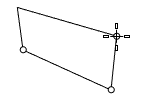
Center
Draws the rectangle from the center point and a corner.
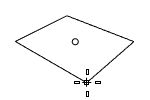
AroundCurve
Draws a rectangle perpendicular to a curve.

1to1
Pick a point to place the Picture plane. The plane size will be the print size of the bitmap image calculated from the resolution (dots-per-inch) and the pixel dimension.
![]() Picture material properties
Picture material properties
Name
The name of the material.
- When an image file is dragged to a Rhino object, a Picture material is created and assigned to the object. The image file name becomes the material name.
- Tiling cannot be modified for a picture texture.
Picture
The Picture contains a simple bitmap image.
Texture
Name
The path and name of the bitmap file.
See also Bitmap Texture.
Self-illuminated
The Self-Illuminated option causes the image to always display at full intensity and is not affected by light or shadow.
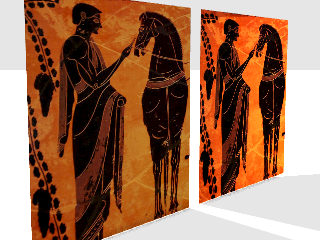
Self-Illumination off (left), and on (right).
Grayscale
The Grayscale option sets the image color to 256-grey
Transparency
Specifies transparency settings for the image. Specify a transparent color to be used as an alpha channel in the case that no alpha channel is specified in the image.
Transparency is not supported when using JPEG (.jpg; .jpeg), PCX (.pcx), or Windows Bitmap (.bmp)
Use alpha channel
Specifies that the image alpha channel be used to determine transparency.
Use color mask
Specifies that a color in the image be used to determine transparency.
Color selector
Tol:
The tolerance to be used to determine if the texture's color matches the transparency color.
Object transparency
Sets the amount of transparency for the entire object.
Notes
Extra text information stored in the material that appears in the tooltip when you mouse-over the thumbnail.