ArraySrf
| Toolbar | Menu |
|---|---|
|
|
Transform Array > Along Surface |
The ArraySrf command copies objects in rows and columns on a surface.
The surface normal direction determines the orientation of the objects.
Steps
- Select objects.
- Pick a base point relative to the objects that will be arrayed on the surface.
- Pick a normal (up) direction for the objects, or press Enter if the normal direction for the object is the construction plane z axis.
This direction will be normal to the surface. - Select the target surface.
- Type the number of elements in the u direction.
- Type the number of elements in the v direction.
The objects are arrayed over the untrimmed surface evenly, spaced along the u and v directions of the surface.
If the surface is trimmed, some of the arrayed base points may be outside the trimmed surface but on the underlying untrimmed surface. In this case, the ShrinkTrimmedSrf command might help with placing the objects.
Command-line options
Mode
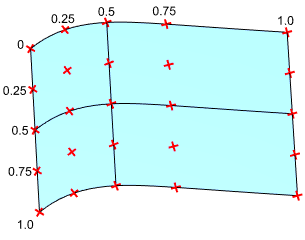
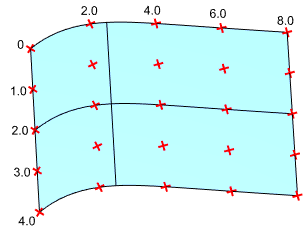
Decides how the array grid is created on the target surface for distributing objects.
UV
The array grid is created by dividing the normalized UV coordinates. Objects might be unevenly distributed.

Isocurve
The array grid is created by dividing the length of the isocurves. Usually produces a more evenly distributed result.

Preview
Provides a preview step where the Mode, UNumber, and VNumber options can be adjusted.
When using History
- Editing the surface updates the location of the arrayed objects.
- Editing the original object changes all of the arrayed objects.