The Decal properties manage object properties for the selected decals.
Decals are non-repeating textures that are applied to the surface of an object with a given projection. They are an easy-to-use way of attaching single images or similar textures to objects without going through the complexity of the texture mapping process.
Decals are textures that are placed directly on a specified area of one or more objects. Use decals to modify a limited part of an object's color.
Decals consist of a single instance of a texture, rather than being tiled as they are when used in a material.
Some uses for decals include:
| ● | Hanging artwork on interior walls. |
| ● | Placing labels or logos on products. |
| ● | Adding signs to the model. |
| ● | Creating stained glass windows. |
![]() Decal properties
Decal properties
Places a new decal on the object.
Steps
| 1. | In the Properties panel, click the Decal button. |
| 2. | On the panel, click the Add button. |
| 3. | In the Select Texture dialog box, select a texture, and click OK. Or click the button. |
| 4. | In the Decal Mapping Style dialog box, select a mapping style, and click OK. |
| 5. | At the prompts for points, pick points on the model to locate the decal. The precise sequence depends on the type of decal selected: Planar, Cylindrical, Spherical, or UV. |
Transparency
Determines the transparency of the selected decal. It works like a multiplier for the texture’s alpha channel.
Selected texture name
Selects a texture from the texture palette. When a texture is selected, a preview is displayed in the preview area below.
Image preview pane
Displays the bitmap image.
Allows relocating and resizing the decal.
Sets the direction of the decal projection.
Forward / Backward
Projects the decal away from the front or back of the decal texture.
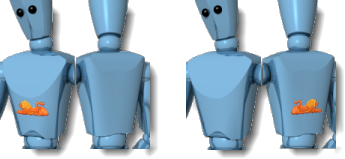
Forward projection (left) and backward projection (right).
Both
Projects the decal away from both the front and the back of the decal texture.

Projection both directions.
Deletes the selected decal.
/
When multiple overlapping decals are applied on a single object, the order in which they are applied may be significant. Decals are applied in the order they appear in the list. The last decal in the list appears to be on top.
Image preview pane
Displays the bitmap image.
The mapping style determines how to project the decal onto the object. It is a good idea to draw construction lines in the scene to help accurately place decals. A rectangle drawn just behind a surface can act as a guide for a standard decal. Use object snaps for accurate placement.
Mapping style
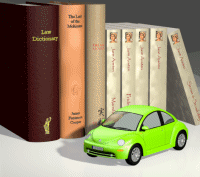
Planar mapping is the most common mapping style. It is appropriate when mapping to flat or gently curved objects.
The corners define the texture's location and extents. If the rectangle does not have the same proportions as the texture, the texture will be stretched or compressed to fit.
When using planar mapping on a curved object, the entire texture projection must lie behind the surface of the object. Portions of the texture that lie in front of the surface will not be visible.

Planar decal.
To place a planar decal
| 1. | At the prompts, pick locations for the decal's Width, and Height direction. |
| 2. | At the Select control point... prompt, select a control point to adjust the image size, rotation, or location. Or press Enter to complete the decal placement. |
Command-line options
Move
Moves the decal. At the Point to move from and the Point to move to prompts, enter any locations as for the Rhino Move command.
UseImageAspectRatio
Restores a stretched decal to the aspect ratio of the original texture.
Set or edit the decal placement using the control widget
Note: When using the planar mapping on a curved object, the entire texture must lie behind the surface of the object. Portions of the texture that lie in front of the surface will not be visible.
To re-size the decal width and height at the same time
Drag the control points at the corners of the control widget.
To change the decal height
Drag the center control point on the top and bottom edges of the control widget.
To change the decal width
Drag the center control point on the left and right edges of the control widget.
To move the decal
Drag the control point in the center of the control widget.
To rotate the decal
Drag the x-, y-, or z-axis control point on the widget axis icon.
The cylindrical mapping type is useful for placing decals onto objects that curve in one direction, such as labels on wine bottles.
The cylindrical projection maps the texture onto the cylinder with the texture's vertical axis along the cylinder's axis, and the horizontal axis around the cylinder.

Cylindrical decal.
To place a cylindrical decal
| 1. | At the prompt, pick a location for the Center point of the cylinder. |
| 2. | At the Select control point... prompt, select a control point to adjust the image size, rotation, or location. Or press Enter to complete the decal placement. |
Command-line options
UseImageAspectRatio
Restores a stretched decal to the aspect ratio of the original texture.
The spherical mapping type is useful for placing decals onto objects that curve in two directions. The spherical projection maps the texture onto the mapping sphere with the texture's vertical axis (height), curving from pole to pole, and the horizontal axis curving around the equator.
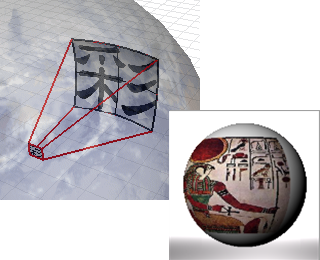
Spherical decal.
To place a spherical decal
| 1. | At the prompt, pick a location for the Center point of the sphere. |
| 2. | At the Select control point... prompt, select a control point to adjust the image size, rotation, or location. Or press Enter to complete the decal placement. |
Command-line options
UseImageAspectRatio
Restores a stretched decal to the aspect ratio of the original texture.
Set or edit the decal placement using the control widget
In addition to the location, width, height, and rotation options, cylindrical and spherical decals also have an Orbit control that allows free rotation of the texture around the center point.
 Map to inside of sphere or cylinder
Maps the texture to the outside (convex) or inside of the sphere or cylinder with a thickness.
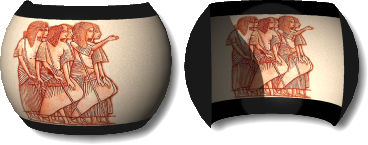
Outside (left), inside (right).
Decals using UV mapping are useful for objects like hair and tree bark where the decal flows and stretches to fit the surface.
The decal covers the entire object, there is no control over the decal placement.
UV mapping uses the u- and v-parameterization of the surface to bend and stretch the texture.


UV decals.
See also
Render the objects using the current renderer.
Rhinoceros 5 © 2010-2015 Robert McNeel & Associates. 17-Sep-2015