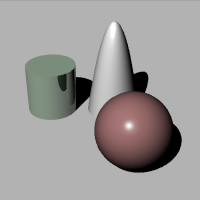
后期处理渲染图片
标准的渲染窗口自身包含了一些内置的功能,如The standard render window includes built in support for cloning, saving to High-Dynamic-Range formats, post effects, zooming and channel display.
工具列
 复制窗口
复制窗口
通过当前的渲染窗口复制出另一个渲染窗口,所有通道和后期效果设置均被保留。
 另存为
另存为
将当前的渲染图像保存为一个图像文件,渲染窗口还包含对 HDRi 和 OpenEXR 输出的内置支持,但这些格式需要由渲染器启用。
支持的文件类型
- Windows 位图 (.bmp)
- JPEG - JFIF Compliant (.jpg, .jpeg, .jpe)
- 便携式网络图像格式 (.png)
- 标签图像文件格式 (.tif, .tiff)
- Truevision Targa (.tga)
- HDRi 文件 (.hdr, .hdri)
- OpenEXR 文件 (.exr)
- Rhino 渲染影像 (.rimage)
 复制
复制
复制整个按钮图示至 Windows 剪贴板。
 显示 RGB 通道
显示图像中的所有颜色通道。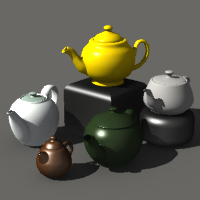
请参考: 维基百科: Channel (digital image).
 显示红色通道
只显示红色通道。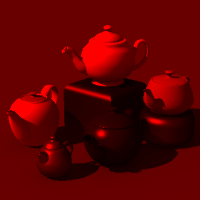
 显示绿色通道
只显示绿色通道。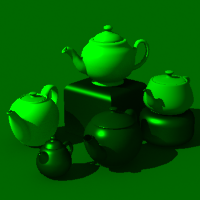
 显示蓝色通道
只显示蓝色通道。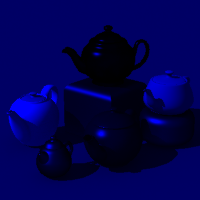
 显示 Alpha 通道
只显示 alpha (透明) 通道。
请参考: 维基百科: Alpha channel.
 显示距离通道
以灰度图像显示出 z-buffer (深度信息)。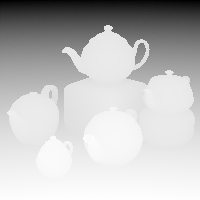
请参考: 维基百科: Z-Buffering.
 打开效果面板
打开效果面板,可以在该面板中调整图像以及为图像添加后期处理效果
 停止渲
停止渲
终止渲染进程。
暂停
暂停与恢复渲染进程。
文件功能表
复制窗口
通过当前的渲染窗口复制出另一个渲染窗口,所有通道和后期效果设置均被保留。
打开
打开一个已保存的 Rhino 渲染文件(.rimage)。这种格式是包含全部通道信息的无损图像格式。这种格式的文件再次打开后还能够添加后期处理效果。
另存为
将当前的渲染图像保存为一个图像文件,渲染窗口还包含对 HDRi 和 OpenEXR 输出的内置支持,但这些格式需要由渲染器启用。
支持的文件类型
- Windows 位图 (.bmp)
- JPEG - JFIF Compliant (.jpg, jpeg, .jpe)
- 便携式网络图像格式 (.png)
- 标签图像文件格式 (.tif, .tiff)
- Truevision Targa (.tga)
- HDRi 文件 (.hdr, .hdri)
- OpenEXR 文件 (.exr)
- Rhino 渲染影像 (.rimage)
打印
通过打印机打印渲染好的图像。
这里只提供基本的打印控制功能,不支持高质量的图像打印系统的颜色管理。推荐打印渲染图像的方法是先将图像保存下来,然后再专业的图像处理程序中处理后再打印。
最近使用
打开最近渲染的图像,这些图像是自动保存为 Rhino 渲染影响(.rimage)格式的。
关闭
关闭渲染窗口。
编辑功能表
复制
复制整个按钮图示至 Windows 剪贴板。
视图功能表
工具列
显示/隐藏工具列。
效果面板
打开效果面板,可以在该面板中调整图像以及为图像添加后期处理效果
显示渲染图像
显示/隐藏图像。
缩放
缩放图像,增加或减少窗口中的像素大小。
通道
默认(RGB)
显示图像中的所有颜色通道。
请参考: 维基百科: Channel (digital image).
红(R)
只显示红色通道。
绿(G)
只显示绿色通道。
蓝(B)
只显示蓝色通道。
Alpha(A)
只显示 alpha (透明) 通道。
请参考: 维基百科: Alpha channel.
距离
以灰度图像显示出 z-buffer (深度信息)。
请参考: 维基百科: Z-Buffering.
法线 X
以灰度显示 X 方向的法线。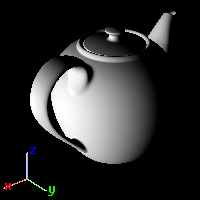
法线 Y
以灰度显示 Y 方向的法线。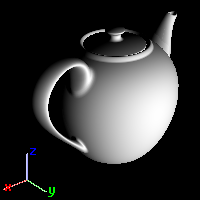
法线 Z
以灰度显示 Z 方向的法线。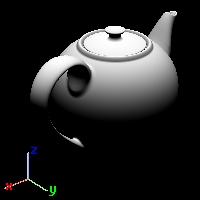
抖动
用于随机量化误差的一种噪声形式,防止渲染图像中出现条带之类的错误图案。
请参考: 维基百科: Dither.
无
不使用抖动。
Floyd-Steinberg
图像处理软件常用的算法,例如,当图像被转换成GIF格式,最大的颜色数量被限制在 256 色。
简易噪点
随机噪点。
说明功能表
显示当前渲染的帮助主题。
效果面板
可以在效果面板中为渲染图像添加后期处理效果。
曝光面板
曝光面板控制伽马校正和色调映射
伽马校正
因为荧幕从暗到亮的变化并非线型的,中间色的显示会偏暗,所以一般图片为了要在荧幕上看起来颜色正确会预先做与荧幕相反的中间色修正,把中间色加亮。中间色是修正图片非常重要的手段。
渲染后的影像如果有中间色偏暗或偏亮的问题可以利用这个数值做修正。
请参考: 维基百科: Gamma correction。
使用线性流程
一般的图片都有经过中间色修正,渲染器利用这种经过修正的非真实影像来进行渲染运算得到的结果当然也不会是正确的,可能会有亮部过亮、暗部过暗的问题。使用线性流程的意思是图片在进入渲染运算之前先把预设的中间色修正还原,使图片具有线性的明暗变化,这样可以得到更真实的渲染结果。

伽马小于 1 (左),默认值 1 (中), 大于 1(右)。
请参考: What is linear work flow and how can it help your renders look better。
色调对应
色调对应是将高动态范围(HDR)的亮度信息转换为荧幕可显示的低动态范围影像的演算方法。高动态范围的亮度的意思是通过 32 位浮点数表示的 RGB(红绿蓝)颜色值,这些值可以小于 1,这意味着将出现量化误差(可以使用抖动来修正),也可以大于 1,这意味着该值大于了显示器最高的显示亮度(例如大于 255)。
当出现“比白色还要亮”的数值,就会超出屏幕的显示范围,色调对应就是将这些数值重新映射到屏幕/位图可以显示的范围以内以更好的显示亮度信息,这里提供了几种不同的色调对应算法。
请参考: 维基百科: High dynamic range imaging。
黑/白点
在指定为黑色与白色的点之间以线性变化,通常一般图片黑点的值为 0.0,白点的值为 1.0。
黑色点
设定黑色点的数值。
白色点
设定白色点的数值。
对数
将响应曲线更改为幂函数,以便缓慢给出较高范围的突显,它是基于亮度值的对数压缩,模仿人对光的反应。
直方图
图像中色调分布的图形表示。 它绘制了每个色调值的像素数量。 通过查看特定图像的直方图,您可以一眼就判断整个色调分布。
保存为文件默认值
默认为显示这个面板
后期处理效果面板
后期处理效果面板显示出了所有可用的后期处理效果。
您可以启用或关闭效果,可以用上移和下移按钮编辑调整位置。处于上方的效果将优先处理。
后期处理效果可以在图像渲染后添加特效或效果。
工具列
 启用
启用
关闭或打开选取的效果。
 上移
上移
将效果在列表中上移,处于上方的效果处理优先级别高于下方的效果。
 下移
下移
将效果在列表中下移,处于上方的效果处理优先级别高于下方的效果。
 属性
属性
打开指定效果的属性页面。
 保存为默认值
将渲染效果列表保存为以后渲染的默认设置。
雾气
雾气效果在图像中添加了依赖于深度的着色效果,可用于添加介于浓雾效果和稀薄效果之间的任意效果。 这种方式与基于环境的 Haze 类似,但它不是在光线跟踪时渲染出来的,而是渲染完成后添加的,可以随时调整。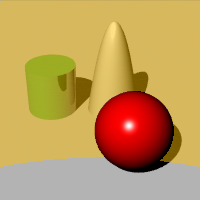
![]() 雾气属性
雾气属性
视觉特性
强度
决定了最大的雾气量, 0.0 表示完全没有雾(不起作用),1.0 表示全雾状态,也可以使用高于 1.0 的值,但在与噪点一起使用时才有意义。
噪点
为雾的强度添加随机变化。
烟雾颜色
调整烟雾的颜色。
指定
在渲染图像中拾取颜色。
![]() 点击图像拾取一个颜色。
点击图像拾取一个颜色。
作用范围
开始距离
距离值为场景中物件到镜头的距离,从多远的距离开始有雾的效果。
指定
在渲染图像中拾取深度。
结束距离
距离值为场景中物件到镜头的距离,含有雾气效果的最远距离。
指定
在渲染图像中拾取深度。
范围
上/右/左/下
指定受雾影响的图像区域,可以用来创建低雾效果。
指定区域
在图像中指定区域。
烟雾背景
决定背景图像是否也有雾的效果,背景将以最大强度雾化。
羽化
决定了边界区域外面的像素数量,产生淡化模糊效果。
预览
当对话框中的数值产生变化时,在图像中预览效果。
| 更改微调控制器中的数字更改的 速率 |
|
|---|---|
| 索引 | 速率 |
|
0.05 |
|
|
0.01 |
|
|
0.002 |
|
光晕
围绕特定颜色产生明亮的区域。它可以用来使有颜色灯光或物体看起来是发光的,要制作霓虹灯效果可以配合它来使用。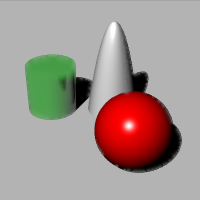
![]() 光照属性
光照属性
视觉特性
启用
为颜色启用光晕。
颜色
最多可以使用 10 种颜色作用于图片。
点击颜色样本,然后就可以在渲染图像中选取一种颜色
![]() 点击图像拾取一个颜色。
点击图像拾取一个颜色。
临界值
在接近该颜色的像素上计算光晕时,控制该颜色的变化量。
光晕大小
决定了明亮像素周围的光晕半径。
增益值
光晕亮度的倍增值,默认值 1.0 得到的结果为正常亮度,更高的值用于极亮的情况。
预览
当对话框中的数值产生变化时,在图像中预览效果。
| 更改微调控制器中的数字更改的 速率 |
|
|---|---|
| 索引 | 速率 |
|
0.05 |
|
|
0.01 |
|
|
0.002 |
|
光芒
使图像中极其明亮的部分出现眩光,它使明亮区域周围的区域更加明亮,该效果通常用于夜景,使灯光看起来更真实。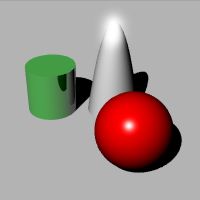
![]() 光芒属性
光芒属性
White point bound
This value determines where in the tonal range the glare will begin. It’s value is represented on the histogram at the bottom of the dialog and can also be adjusted graphically. Pixels lighter than the bound (either in luminance or the gray-scale value depending on the photometric mode) will glare.
Glare Size
Determines the radius of the glare around the bright pixel.
增益值
Multiplier for the lightness of the glare. The default value of 1.0 should result in normal glare effects. Higher values can be used for extremely bright glare.
Use photometric information
Determines the glare mode. This check box is unavailable if there is no luminance information in the image (it was rendered with the simple raytracer). When using photometric glare, the amount of glare is controlled by how “whiter than white” the pixel is. Otherwise the effect uses the whitest pixels in the image.
预览
当对话框中的数值产生变化时,在图像中预览效果。
| 更改微调控制器中的数字更改的 速率 |
|
|---|---|
| 索引 | 速率 |
|
0.05 |
|
|
0.01 |
|
|
0.002 |
|
Depth of Field
Blurs the image depending on the distance from the camera.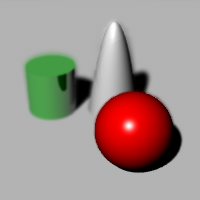
![]() 景深属性
景深属性
视觉特性
Blurring Strength
Determines the amount of blurring. This is an arbitrary value and you will find different values will work better with different images.
Max Blurring
Determines the maximum Gaussian blurring radius used. Since extremely blurred areas can cause the effect to be slow, this limits the effect.
作用范围
焦距
图像清晰部分与镜头的距离。
指定
在渲染图像中拾取距离。
Blur background
Determines whether the background is blurry. The background will be blurred at the maximum effect.
预览
当对话框中的数值产生变化时,在图像中预览效果。
| 更改微调控制器中的数字更改的 速率 |
|
|---|---|
| 索引 | 速率 |
|
0.05 |
|
|
0.01 |
|
|
0.002 |
|
Points, Curves, Isocurves, Annotations
Determines whether the wireframe objects are displayed in the render window.
Line and point sizes are determined by the Rendered viewport display settings.
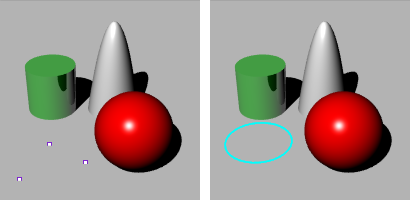
Points on (left), Curves on (right).
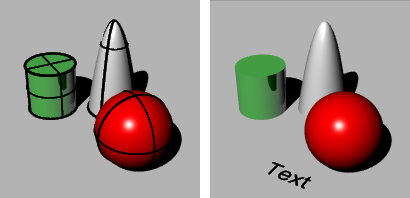
Isocurves on (left), Annotations on (right).
色调
在渲染以后调整材质的颜色。
在不需要重新渲染整个场景的情况下,您可以尝试通过这个功能组合不同的颜色。
Since the hue adjuster works on the pixels of the rendered image, it has no knowledge of what contributed to the color of the pixel other than the topmost object. For example reflections of the object on other objects and parts of the object seen through transparent objects will not update.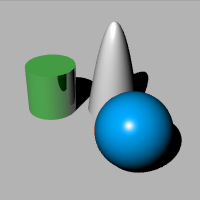
![]() 色调属性
色调属性
Material 1 / 2 / /3
Up to three material colors at a time can be changed.
 Eye dropper
Select an object with a color from the image to change. The hue post process only affects objects with color other than white, neutral gray, or black.
Color preview swatch
Displays the current color.
Hue change value
Changes the hue. All objects using the same material will be updated.
预览
当对话框中的数值产生变化时,在图像中预览效果。
| 更改微调控制器中的数字更改的 速率 |
|
|---|---|
| 索引 | 速率 |
|
0.05 |
|
|
0.01 |
|
|
0.002 |
|
重设
Changes the settings back to the default values.
饱和度
![]() 饱和度属性
饱和度属性
饱和度
Sets the saturation amount. The smaller the saturation, the more monochromatic the image.
Tint
Defines the color that will replace medium gray when saturation is set to zero. For example if you want to make a sepia shade rendering, set the Tint color to greyish olive/brown, and set Saturation to zero.
预览
当对话框中的数值产生变化时,在图像中预览效果。
| 更改微调控制器中的数字更改的 速率 |
|
|---|---|
| 索引 | 速率 |
|
0.05 |
|
|
0.01 |
|
|
0.002 |
|
重设
Changes the settings back to the default values.
焦距模糊
Focal blur is a quick version of the Focal Blur Properties. The parameters are compatible with 35mm single-lens-reflex camera and depend on the camera lens length in the viewport to render.
The quick focal blur is done by going through the image pixel by pixel, determining the size of the pixel based on the depth, and pasting each pixel back to a new image. Pixels at focal plane are smaller and stronger, and pixels away from the focal plane are bigger and weaker.
The quick focal blur is only an estimate. It cannot add any information to the scene, so, for example, objects in focus partially visible behind an object completely out of focus will not look as good and realistic as the same scene rendered with slow focal blur that actually traces additional rays to create the effect.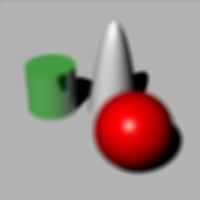
![]() 焦距模糊属性
焦距模糊属性
焦距
The distance from Rhino camera location to the plane perpendicular to it that should be in focus. The real-world equivalent is the focus ring on a SLR camera.
光圈
The bigger the number, the deeper the area in focus. The smaller the number, the shorter the area in focus.
Update slow focal blur settings in document properties
The focal distance and aperture are copied to Rhino Render document settings so that a subsequent render using slow and accurate focal blur will use the settings.
预览
当对话框中的数值产生变化时,在图像中预览效果。
| 更改微调控制器中的数字更改的 速率 |
|
|---|---|
| 索引 | 速率 |
|
0.05 |
|
|
0.01 |
|
|
0.002 |
|
重设
Changes the settings back to the default values.
Gaussian Blur
Adds Gaussian blur to the image. The number is the radius of the blur kernel, equivalent to the same setting in paint applications.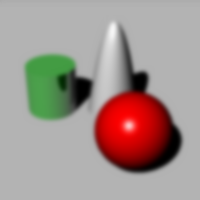
![]() 高斯模糊属性
高斯模糊属性
水平
Specifies the blurring to be horizontal. This can be used to create a horizontal motion blur effect.
垂直
Specifies the blurring to be vertical. This can be used to create a vertical motion blur effect.
两方向
Blurs in both directions.
预览
当对话框中的数值产生变化时,在图像中预览效果。
| 更改微调控制器中的数字更改的 速率 |
|
|---|---|
| 索引 | 速率 |
|
0.05 |
|
|
0.01 |
|
|
0.002 |
|
重设
Changes the settings back to the default values.
噪点
Noise adds noise to the image.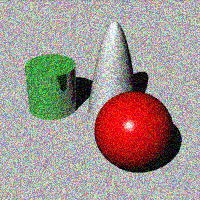
![]() 噪点属性
噪点属性
噪点
By default RGB channels are separated, so adding noise to a gray-scale image makes individual pixels shift towards random color.
Monochromatic
Only the darkness/lightness of the pixel is altered. The color stays the same.
预览
当对话框中的数值产生变化时,在图像中预览效果。
| 更改微调控制器中的数字更改的 速率 |
|
|---|---|
| 索引 | 速率 |
|
0.05 |
|
|
0.01 |
|
|
0.002 |
|
重设
Changes the settings back to the default values.
Rhino 图片文件格式(.rimage)
Rhino 渲染器可以保存 .rimage 文件,这是一个专有的文件格式,可存储渲染引擎所有渲染的信息,包括颜色、alpha、深度,常规通道。全部采用32位每通道的分辨率。
渲染窗口可以使用这些信息执行后期处理和曝光操作,第三方渲染器也可以使用它实现其他效果。
渲染时间之后,可以立即使用 .rimage 格式存储数据,这样只有就可以进行后期处理和曝光调整或更改格式(保存为不同的格式,而信息不会丢失)。
.rimage 格式仅可以在 Rhino 渲染窗口中使用,而不能在其他软件中使用,这是一种高动态范围的格式,支持将信息无损的传输到 .HDR 和 .EXR 格式,它是未压缩的格式,文件可能很大。
打开一个 .rimage 文件
- 在 Rhino 渲染窗口中的文件工具列,点击“打开”。
或 - 使用 RenderOpenRenderImage 指令在渲染窗口打开一个 .rimage 文件。
已经完成的渲染将以 .rimage 格式保存到硬盘上的临时位置,一旦重新打开一个已完成的渲染,所有的后期效果和曝光设置依然可用,就好像渲染刚完成一样。
打开一个最近使用过的 .rimage 文件
- Rhino 渲染窗口中,在“文件”功能表,点击“最近打开”,然后选择一个文件。
文件是以渲染的日期和时间命名的。
更多渲染图片后期处理的信息,请参考: 渲染图片后期处理。
