![]()
![]()
Curve
Blend Curves >
Adjustable Curve Blend
| Toolbar | Menu |
|---|---|
|
|
Curve Blend Curves > Adjustable Curve Blend |
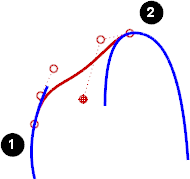
The BlendCrv command creates a blend curve between curves and / or surface edges with control over the continuity with the input curves.
| Selection options | |
|---|---|
|
BlendStart |
Specifies where on the curve the blend will start. CurveEndStarts the blend at the end of the curve where the curve was selected. PickPointStarts the blend at the location on the curve where the curve was selected. |
|
Edges |
Restricts selection to surface edges. |
|
Point |
Specifies a point to blend to. |
|
Edit |
If the blend was made with history recording on, you can select the blend to re-edit the curve. |
|
Type subcrv to select part of a curve as input. |
|
Adjust Curve Blend options
|
Continuity Curve |
Sets the continuity option between the blend curve and the input curves or edges. |
|
Flip 1 / 2 |
Reverses the direction of the specified curve. |
|
Trim |
Trims the input curves to the resulting curve. |
|
Join |
Joins the resulting curves. |
|
Show Curvature |
Displays the curvature graph. |
| Keys for control | |
|---|---|
|
Alt |
Hold Alt while dragging the handles to change the angle between the shape curve and the surface edge. By default the shape curves are perpendicular to the surface edge. |
|
Shift |
Hold Shift to control symmetry. By default the shape curves are separately edited at each end, with symmetry, point editing is mirrored to the other end of the curve. |
Fillet, blend, or chamfer between curves and surfaces
Rhinoceros 6 © 2010-2020 Robert McNeel & Associates. 11-Nov-2020