Modeling in 3‑D is the process of creating a mathematical representation of an object's surfaces. The resulting model is displayed on your screen as a two-dimensional image. Rhino provides tools for creating, displaying, and manipulating these surfaces.
The image below illustrates some of the major features of the Rhino window.
Menu (1)
The menus group Rhino commands by function.
History window (2)
The command history window displays the previous commands and prompts.
The command prompt displays prompts for the current command actions, options for the command that you can click, and allows typing command names and options.
Toolbars (4)
Toolbars contain graphical icons for initiating commands. Many toolbar icons have a second command that you can access by right-clicking the icon. The tooltip that appears when you hover over the icon tells you what the left and right mouse button do.
 To access the command on the first line
| 4 | Click the icon with the left mouse button. |
 To access the command on the second line
| 4 | Click the button with the right mouse button. |
Viewports (5)
Viewports display the Rhino working environment.
Tabbed panels contains layers, properties, and other settings.
Rhino is a command driven program. In other words, all actions are activated by named commands such as Line, Box, or CurvatureAnalysis.
Commands are accessed through the menus, or the toolbars, or by typing the command name. In the next sections, you will explore using these methods. You may find one method easier than another. The choice is yours, and there is no preference for one method over another.
In the exercises, you will use Rhino’s commands, navigation tools, shaded modes, render, and use some basic object manipulation.
In this session you will
| 4 | Start a command by choosing from the menu. |
| 4 | Start a command by choosing from a toolbar icon. |
| 4 | Start a command by typing. |
![]() To start your first Rhino model
To start your first Rhino model
| 1. | Start Rhino. |
| 2. | On the File menu, click New. |
| 3. | In the Open Template File dialog box, select SmallObjects - centimeters.3dm and click Open. |
Most Rhino commands are arranged in the menus.
![]() Start the Cone command
Start the Cone command
| 4 | On the Solid menu, click Cone. |
Draw the cone
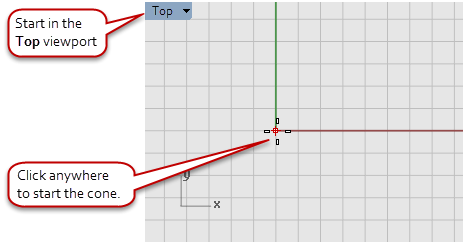
| 1. | At the Base of cone… prompt, in the Top viewport, click with the mouse to pick the center point for the base of the cone.
|
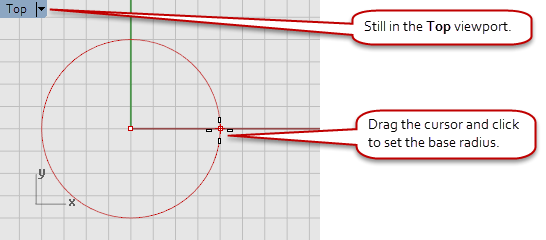
| 2. | At the Radius… prompt, in the Top viewport, drag the mouse and click to draw the cone’s base.
|
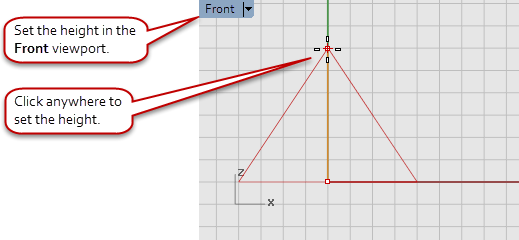
| 3. | At the End of cone prompt, in the Front viewport, drag the mouse and click to draw the cone’s point.
|
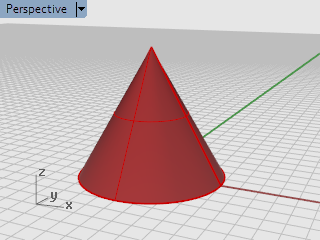
| 4. | Watch what happens in the Perspective viewport.
|
Toolbars provide a graphical interface to the commands.
To display a button tooltip, hover your mouse over the icon
| 4 | The command names that are activated with the left and right mouse clicks display.
|
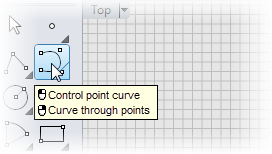
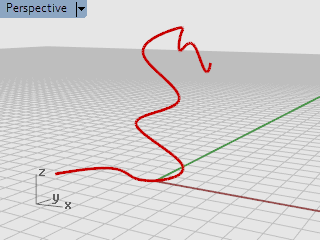
![]() Start the Curve command
Start the Curve command
| 4 | On the toolbar docked on the left side of the Rhino window, click the icon for Control point curve. |
Draw the curve
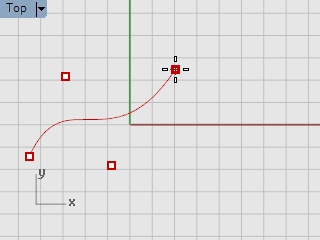
| 1. | At the Start of curve… prompt, in the Top viewport, click the mouse to start the curve. |
| 2. | At the Next point... prompts, click a few more points in the Top viewport.
|
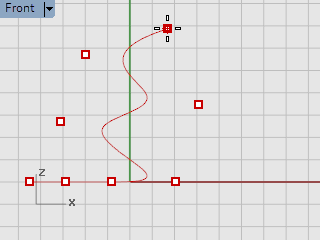
| 3. | At the Next point... prompts, move the mouse into the Front viewport and click a few more points.
|
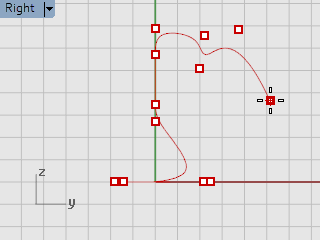
| 4. | At the Next point... prompts, move the mouse into the Right viewport and click a few more points.
|
| 5. | Right-click, press Enter or press the spacebar to complete the curve. |
| 6. | Check out the Perspective viewport.
|
Admire your work
| 4 | Drag with the right mouse button to rotate the Perspective view. |
You can start a command by typing the command name.
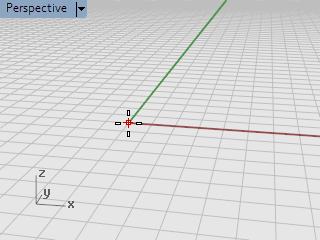
 Start the Sphere command by typing
| 4 | Click at the command prompt, and type Sphere. |
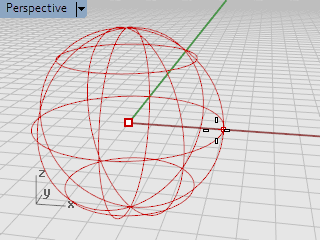
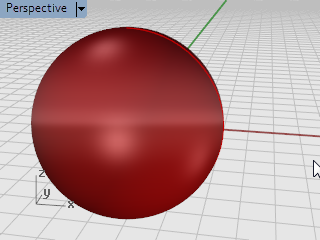
Draw the sphere
| 1. | At the Center of sphere… prompt, in the Perspective viewport, click the mouse to pick the center point for the sphere.
|
| 2. | At the Radius… prompt, in the Perspective viewport, move the mouse away from the center point, and click the mouse to draw the sphere and click.
|
| 3. | In the Perspective viewport, click the down-arrow on the viewport title, and on the menu, click Shaded.
|
If you did something you did not want to do, you can undo your actions.
![]() Undo a command
Undo a command
| 4 | On the Edit menu, click Undo, or press the Ctrl and Z keys. |
![]() Redo commands
Redo commands
| 4 | On the Edit menu, click Redo, or press the Ctrl and Y keys. |
The command window contains the command history and the command prompt.
The command prompt is where you can type command names, set options, enter distances and angles for drawing, and read the prompts for the commands.
The command prompt displays options for the command in parentheses. To activate an option, click the option with the mouse or type the option name or the underlined letter in the option.
Options give you alternate methods for using the command. Prompts are messages to you to select objects to act on, to enter information, or to enter a point on the screen. As you start to build objects, prompts become increasingly important, since they tell you what to do next.
Command options change how a command acts. For example, when you draw a circle, the circle is normally drawn on the active construction plane. The Circle command has several options including Vertical and AroundCurve. Command options appear in parentheses at the prompt.
To use a command option, click the option name, or type the underlined letter of the option or the whole option name.
Choose a command option
| 1. | At the command prompt, type Circle. |
| 2. | The options for the Circle command appear: Center of circle (Deformable Vertical 2Point 3Point Tangent AroundCurve FitPoints) |
| 3. | To draw a circle vertical to the active construction plane, use the Vertical option. Click Vertical, or type V. |
Many tasks in Rhino are repetitive. You might want to move or copy several objects, for example. Methods for repeating commands are provided.
 To repeat the last command
| 4 | Press the Enter key when no command is active. |
| 4 | In addition to pressing the Enter key on your keyboard, you can press the Spacebar or click the right mouse button in a viewport. These all perform the same function. |
Some commands, such as Undo and Delete do not repeat. Instead, the command prior to these commands is repeated. This prevents you from accidentally undoing too many commands or deleting objects accidentally.
In addition, you often want to repeat the command you were using before undoing a mistake. You can define the list of commands that do not repeat to suit your own way of working.
The Rhino Help file is the major resource for detailed information on specific commands.
To get help on a specific command
| 4 | To get Help for a command, press F1 while the command is running. |
| 4 | On the Help menu, click Command Help. The Rhino Help will display in a dockable window. Click Auto-Update to display the Help topic for the current command. The Help window appears with the specific command topic visible. |
| 4 | Go to Rhino Help for the most up-to-date Help information. |
| 4 | Find the answers to frequently asked questions at: Rhino Support. |