Rhino opens with the default toolbar layout open. The default toolbar layout displays only one of the many Rhino toolbar groups, the Standard Toolbar Group. Most of the unopened toolbars in the default toolbar layout are linked to buttons this toolbar.
The toolbar docked at the left of the screen is the Sidebar that is linked to the Standard Toolbar Group.
Open a toolbar
| 1. | On the Tools menu, click Toolbar Layout. |
| 2. | On the Rhino Options |
| 3. | Under Toolbars, select toolbars to open, and click OK. Or use the toolbar group Options icon |
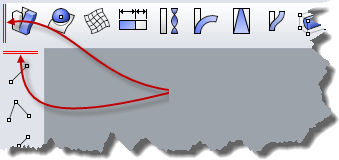
| 1. | Drag the toolbar handle.
Toolbar handles. |
| 2. | Release the mouse button to place the toolbar. A tab will appear on the toolbar.
|
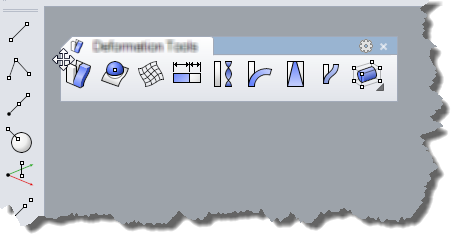
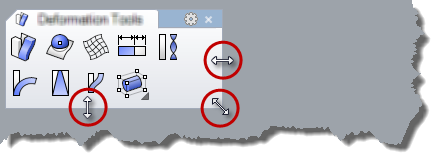
Reshape a floating toolbar group
Drag the toolbar group border.
Notice that the cursor changes shape to indicate that the toolbar group can be re-sized.
Each free-standing toolbar is actually a toolbar group.
Parts of a toolbar group
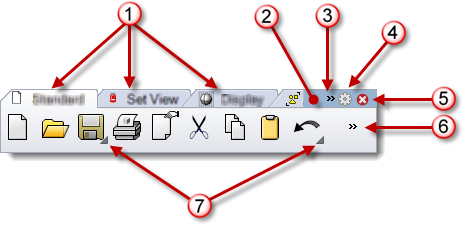
Tabs (1), group handle (2), scroll control (3), options menu icon (4), close button (5), Show more (6), and linked toolbar cascade button (7).
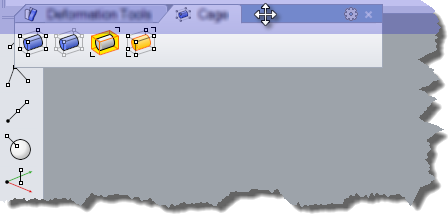
Click the cursor on a tab to drag it.
Tabs can be moved from group to group or made to be free standing.
Move a toolbar tab
Drag the toolbar tab to a different group or a blank area on the screen to make it a free-standing group.
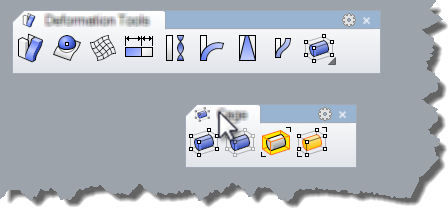
Move a toolbar tab to another group
Drag the toolbar tab to a different group.
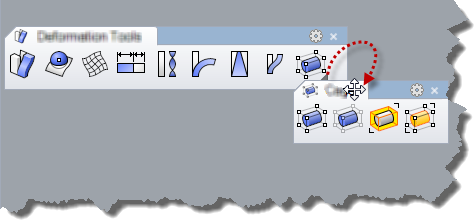
Copy a toolbar tab to another group
Hold Ctrl and drag the toolbar tab to a different group.
Click the cursor in the handle area to move the whole toolbar.
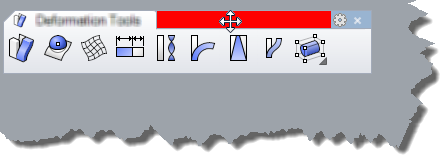
Group handle area indicated in red.
Drag the toolbar group handle.
Note: The cursor changes shape to a four-direction arrow when the handle is active.
| 1. | Drag the toolbar group handle to the edge of the Rhino graphics area. A blue shape will light up the area where the toolbar will dock. |
| 2. | Release the mouse button to dock the toolbar. The toolbar docks.
|
Prevent a toolbar from docking while being dragged
To prevent a toolbar from docking when you drag it near viewport edges, press and hold Ctrl while you drag the toolbar.
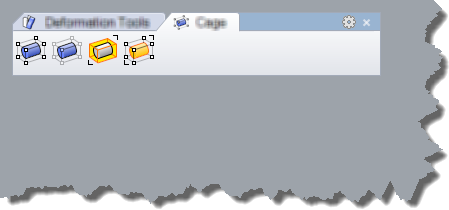
If the toolbar group is not expanded to show all tabs, a Scroll control appears.
Click the scroll control and select a tab name from the menu. The selected tab comes to the front.
Opens the group Options menu.
See: Customize toolbars.
Options
Show Toolbar
Opens a toolbar as a free-standing group.
New Button
Adds a new button and opens the Button Editor.
New Separator
Inserts a button separator.
Edit Button
Opens the selected button in the Button Editor.
New Tab
Creates a new blank tabbed toolbar.
Show or Hide Tabs
Shows/hides a toolbar tab in the current group.
Size to content
Expands a toolbar to show all buttons.
Properties
Opens the Toolbar Properties dialog box.
Closes the group.
If the tab is not expanded to show all buttons, a Show more control appears.
Click the Show more control and select a button name from the menu. The selected command runs, or the linked toolbar opens as a menu.
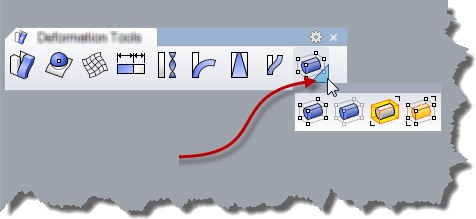
Cascades a toolbar linked to that button.
Cascade a linked toolbar
| 1. | Click the triangle in the lower right of a toolbar button to cascade a linked toolbar.
Toolbar link indicator. |
| 2. | Drag the title bar of the toolbar to a new position.
|
To prevent the toolbars from being accidentally moved, lock them.
Note: Locking the toolbars also locks any docked panels.
Click the toolbar group menu icon and on the Toolbar group menu, click Lock Docked Windows.
- or -
Right-click in the group handle area or tab, and click Lock Docked Windows.
The sidebar is a special toolbar that is populated with a specified group by the currently active tab. When the tab is active, the contents of the Sidebar toolbar changes to the toolbar tab specified in the Toolbar Properties.
For example
| 1. | In the Default workspace, notice the contents of the toolbar docked at the left. This is the Sidebar displaying the contents of the Main toolbar. |
| 2. | In the Standard toolbar group (usually docked at the top of the workspace, under the command prompt, click the Curve Tools tab. Notice that the buttons in the Sidebar change to the contents of the Curve Tools toolbar. Other tabs with Sidebars include Mesh Tools, Solid Tools, Render Tools, and Drafting. |
Restoring lost toolbars
If your toolbars are lost or become corrupted, they can be restored with the ToolbarReset command.
Warning:
The ToolbarReset command replaces all custom toolbars and groups with the default set that ships with Rhino.
| 1. | Move the cursor over the toolbar button. |
| 2. | Press and hold Shift. |
| 3. | Click the left mouse button and drag the toolbar button to a different toolbar or to a different position in the same toolbar. |
| 1. | Move the cursor over the toolbar button. |
| 2. | Press and hold Ctrl. |
| 3. | Click left mouse button and drag the button to another location in the same toolbar or to a different toolbar. |
| 1. | Move the cursor over the toolbar button. |
| 2. | Press and hold Shift. |
| 3. | Click the left mouse button, drag the toolbar button outside the toolbars and drop. |
| 1. | Open the parent toolbar that will contain the link button. |
| 2. | Open the child toolbar that will be linked to it. |
| 3. | Press and hold Ctrl. |
| 4. | With the right mouse button down, drag a button from the child toolbar to the parent toolbar. A copy of the button appears in the parent toolbar with the white triangle link symbol in its corner. |
Unlink a toolbar
| 1. | Move the cursor over the linked button. |
| 2. | Press and hold Shift. |
| 3. | Click the right mouse button to open the Edit Toolbar Button dialog box. |
| 4. | Click . |
See also
Rhinoceros 5 © 2010-2015 Robert McNeel & Associates. 17-Sep-2015