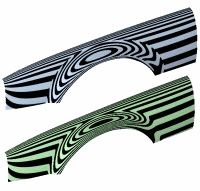
The Zebra command visually evaluates surface smoothness and continuity using a stripe map.
Steps
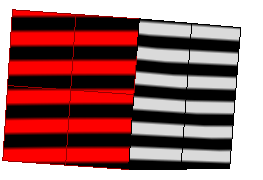
| 1. | Set the stripe direction, size, and color. |
| 2. | Set the stripe color to contrast with the base color of the object to see the zebra stripes. The first stage is to set the detail level for the analysis mesh. You can increase the density of the mesh if the level of detail is not fine enough.
|
Note: The Zebra command is one of a series of visual surface analysis commands. These commands use NURBS surface evaluation and rendering techniques to help you visually analyze surface smoothness, curvature, and other important properties.
Position Only (G0)
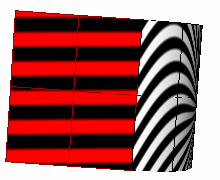
If the stripes have kinks or jump sideways as they cross the connection from one surface to the next, the surfaces touch, but have a kink or crease at the point where the zebra stripes jag. This indicates G0 (position only) continuity between the surfaces.
Tangent matches; curvature does not match (G1)
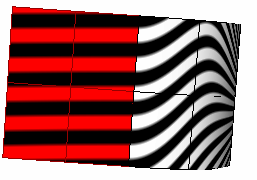
If the stripes line up as they cross the connection but turn sharply at the connection, the position and tangency between the surfaces match. This indicates G1 (position + tangency) continuity between the surfaces. Surfaces that are connected with the FilletSrf command display this behavior.
Position, curvature, and tangency match (G2)
If the stripes match and continue smoothly over the connection, this means that the position, tangency, and curvature between the surfaces match. This matching indicates G2 (position + tangency + curvature) continuity between the surfaces. Surfaces connected with the BlendSrf, MatchSrf, or NetworkSrf commands display this behavior. When you use surface edges as part of the curve network, the NetworkSrf options allow any of these connections.
If, when you use the Zebra command, the selected objects do not already have a surface analysis mesh, an invisible mesh will be created based on the settings in the Polygon Mesh Options dialog box.
Polygon Mesh Options
Fewer polygons – More polygons
The slider roughly controls the density and number of mesh polygons. Set the slider and click
Preview
The mesh is drawn as a preview in the viewports, and the dialog box stays on screen for more adjustments.
Detailed Controls
Opens the Polygon Mesh Detailed Options dialog box.
The surface analysis meshes save in the Rhino files. These meshes can be large. The RefreshShade command and the Save geometry only option of the Save and SaveAs commands remove any existing surface analysis meshes.
To properly analyze a free-form NURBS surface, the analysis commands generally require a detailed mesh.
The ZebraOff command turns off zebra analysis and closes the Zebra dialog box.
Steps
Close the Zebra Options dialog box.
See also
Rhinoceros 5 © 2010-2015 Robert McNeel & Associates. 17-Sep-2015