Viewports are windows in the graphics area that display views of your model. They can be docked or floating.
You can customize the viewports and their positions to suit your preferences. The size and position of viewports is adjustable; they can be any rectangular size and shape.
Each viewport has its own construction plane and grid that the cursor normally moves on and a projection mode. To toggle between a small viewport and one that fills the graphics area, double-click the viewport title.
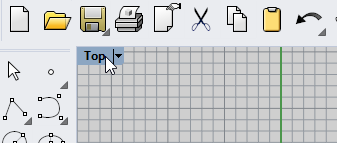
The viewport title has some special functions for manipulating the viewport. To move a viewport, drag the viewport title. To re-size a viewport, drag the viewport border. You can create new viewports, rename viewports, and use predefined viewport configurations from the viewport title menu.
Right-click the viewport title, or click the small black triangle to display the viewport title menu.
The viewport title menu contains most of viewport and display related commands. The same commands can be found in the View menu on the main menu bar.
Graphical projection is used in technical drawing to project an image of a three-dimensional object onto an imaginary fixed plane.
The viewport projection can be parallel, three-point perspective, or two-point perspective. The viewport projection is set in Viewport Properties. When no object is selected, the Properties panel shows viewport properties.
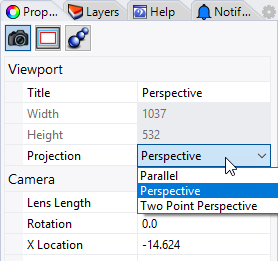
In the default four-viewport layout, there are three parallel viewports (Top, Front and Right) and one perspective viewport.
For more information about graphical projections, see https://en.wikipedia.org/wiki/Graphical_projection.
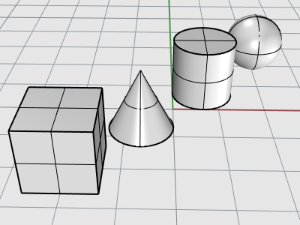
In a parallel view, all the grid lines are parallel to each other, and identical objects look the same size, regardless of where they are in space. Parallel views are also called orthogonal views in some systems.
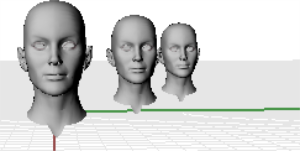
A perspective view, uses three-point perspective. Grid lines converge to a vanishing point. This provides the illusion of depth. Perspective projection makes objects farther away look smaller.
In a two-point perspective view, objects look smaller as their horizontal distance increases, but look the same as their vertical distance increases.

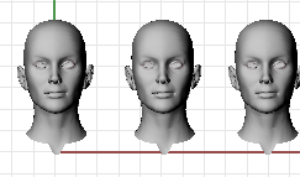
Perspective (left) vs. Two Point Perspective (right).
Working in 3‑D on a computer requires visualizing 3‑D objects drawn on a 2‑D medium - the computer screen. Rhino provides tools to help do this.
Rhino’s easy view navigation helps you visualize your model. You can look at you model from any direction, look at the whole model, or look into the details. You can change your view in the middle of a command to see precisely where you want to select an object or pick a point.
Dragging with the right mouse button easily manipulates the views so you can look at the model from various angles. Mouse navigation works differently in parallel and perspective viewports. In parallel viewports, right mouse drag pans the view. In a perspective viewport, right mouse drag rotates the view, and you must use the Shift key modifier to pan the view.
 To pan the view
 Undo or
  redo view changes
If you get lost, there are several ways to get yourself reoriented:
In parallel viewports (for example: Top, Front, and Right), drag with the right mouse button.
In perspective viewports, hold the Shift key, and drag with the right mouse button.
In perspective viewports, drag with the right mouse button.
Note: Rotating a parallel view is not common. It is a special operation that should be used rarely and with caution.
In parallel viewports (for example: Top, Front, and Right), hold the Ctrl and Shift keys, and drag with the right mouse button.
Hold the Ctrl key, and drag up and down with the right mouse button, or rotate the mouse wheel.
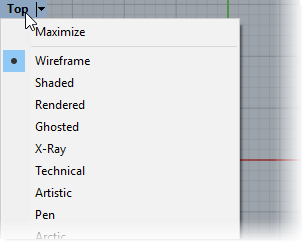
You can view your model in a variety of wireframe, shaded and rendered methods that depend on your needs. Wireframe mode usually offers the fastest display speed. Shaded modes offer the ability to view surfaces and solids with shading to help you visualize the shapes.
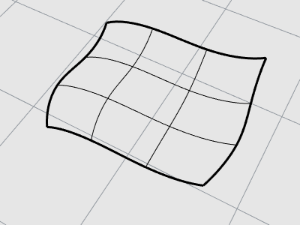
In Wireframe mode, surfaces look like a set of curves that cross each other. These curves are called isoparametric curves or isocurves. Isocurves do not actually define the surface. They are merely a visual aid.
Open the sample model, Start.3dm.
(Help menu > Learn Rhino >Tutorials and Samples > User's Guide > Start)

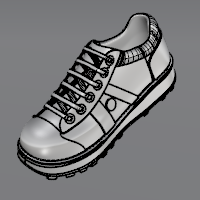
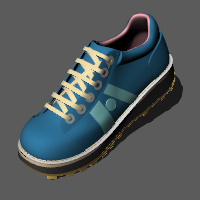
The Shaded modes, (for example, Shaded, Rendered, Artistic, and Pen) display surfaces and solids with render meshes to show surfaces.
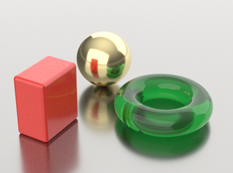
The Rendered mode shows objects with lighting and render materials applied.
The Raytraced mode displays objects with materials and raytraces the scene and lighting in real-time.
Other display modes and custom settings are described in the Rhino Help.
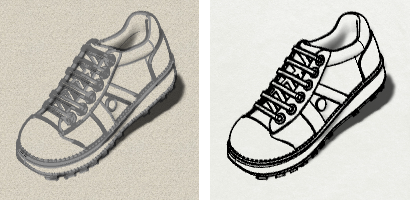
Artistic (left) and Pen (right) display modes.
Rhino for Windows © 2010-2018 Robert McNeel & Associates. 24-Nov-2021