The viewport title has some special functions for manipulating the viewport.
| 4 | Click the title to make the viewport active without disturbing the view. |
| 4 | Double-click the viewport title to maximize the viewport. Double-click again to restore the size to normal. |
Viewports can have one of three projections: parallel, perspective or two-point perspective.
Right mouse navigation works differently in the two viewport styles. In parallel views, right mouse dragging pans the view. In perspective views, right-mouse dragging rotates the view. In the usual four-viewport layout, there are three parallel viewports and one perspective viewport.
Parallel
Parallel views are also called orthogonal views in some systems. In a parallel view, all the grid lines are parallel to each other, and identical objects look the same size, regardless of where they are in space.
Perspective
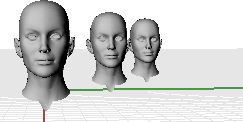
In a perspective view, grid lines converge to a vanishing point. This provides the illusion of depth in the viewport. Perspective projection makes objects farther away look smaller.
Rhino’s easy navigation helps you to visualize your model.
The simplest way to change the view is to drag the mouse with right button held down. This pans the view in parallel views and rotates the view in perspective views.
You can change your view in the middle of a command to see precisely where you want to select an object or choose a point.
| 4 |
|
|
Command |
Key and mouse combinations |
|---|---|
|
|
In parallel viewports (for example: Top, Front, and Right), drag with the right mouse button. In perspective viewports, hold the Shift key, and drag with the right mouse button. |
|
|
In perspective viewports, drag with the right mouse button. |
|
|
|
Working in 3-D on a computer requires visualizing three-dimensional objects drawn on a two-dimensional medium—the computer screen. Rhino provides tools to help do this.
Drag with the right mouse button to easily manipulate the views to look model from various angles. Use the right mouse button view manipulations in both wireframe and shaded views.
 To pan in a viewport
| 4 | In the Top viewport, drag the mouse with the right mouse button held down to pan the view. |


If you get lost, there are several ways to get yourself reoriented:
| 4 | Press the Home key |
| 4 | Press the End key |
| 4 | To set your view so you are looking straight down on the construction plane, use the Plan command. |
| 4 | To bring all your objects into view, use the Zoom command Extents option. |
Practice rotating the view
| 1. | Click the left mouse button in the Perspective viewport to make it active. An active viewport is the viewport where all your commands and actions take place. The active viewports title highlights so you can easily see which viewport is active. |
| 2. | In the Perspective viewport, drag the mouse with the right mouse button held down to rotate the view and see the objects from a different angle. |
You can view your model in a variety of ways that depend on your own needs. Wireframe mode usually offers the fastest display speed, shaded modes offer the ability to view surfaces and solids with shading to help you visualize the shapes.
Standard and customized shaded modes allow easier visualization of surfaces and solids.
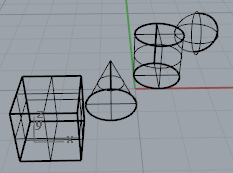
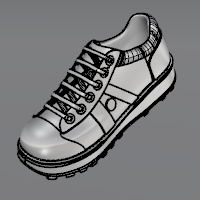
In Wireframe mode, surfaces look like a set of crossing curves. These curves are called isoparametric curves or isocurves.
Isocurves do not define the surface the way the polygons do in a polygon mesh. They are merely a visual aid.
![]() To set wireframe mode
To set wireframe mode
| 1. | Click a mouse button in the Perspective viewport to make it active. An active viewport is the viewport where all your commands and actions take place. |
| 2. | On the viewport title menu, click Wireframe.
|
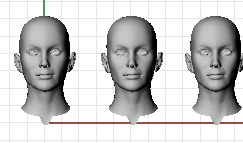
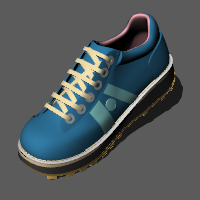
The Shaded modes, (for example, Shaded, Rendered, Artistic, and Pen) display surfaces and solids with the surfaces shaded using their layer, object, or custom color. You can work in any of the shaded modes. The surfaces are opaque or transparent.
![]() To set shaded mode
To set shaded mode
| 1. | On the viewport title menu, click Shaded.
Rotate your view by holding down the right mouse button and dragging from the bottom of the view toward the top. You are now under the objects looking up. The construction plane grid helps you stay oriented. If the objects are behind the grid, you are looking at the bottom of the construction plane. |
| 2. | Press the Home key to undo your view changes. |
![]() Rendered
Rendered
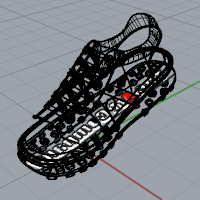
Rendered mode shows the objects with lighting and render materials applied.
Other display modes and custom settings are described in the Rhino Help.
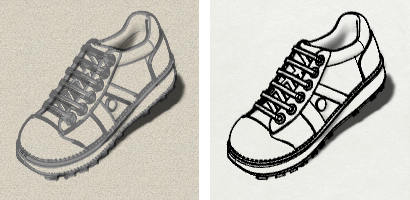
Artistic (left) and Pen (right) display modes.
The viewport title has some special functions for viewport control.
| 4 | Click the title to make the viewport active without disturbing the view. |
| 4 | Double-click the viewport title to maximize the viewport. Double-click again to restore the size to normal. |