Lighting scheme
The lighting used by the display mode.
Lighting method
No lighting
No shading occurs when there is no light sources added to the scene.
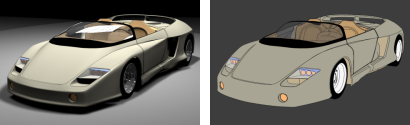
Scene lighting (left), No lighting (right).
Default lighting
Uses a single "head lamp" light.
Scene lighting
Uses the light objects that exist in the current model/scene.
Custom lighting
Sets up to eight custom lights.
Customize
Set an x, y, and z direction and color for each light.
Custom Lighting Setup
Light #
Up to eight lights are available.
Direction
Setting the directional value to 0,0,0 disables the light.
Color
The color the light shines on objects.
Specular
The highlight color the light creates on glossy objects.
Use current scene lights
Identifies any lights in the scene that are Directional lights, and uses up to eight lights to populate the fields in the dialog.
Note
- This option deletes all current values in the dialog, even if there were no directional lights found in the scene.
- The directional lights are converted to camera-directional lights using world coordinates.
Apply
Applies the lighting to the model.
Ambient color
Use advanced GPU lighting
With normal, per-vertex lighting, calculations only occur for each vertex in a mesh. Everything else in between is interpolated (invented).
This has major limitations for shading, lighting, and texturing, especially when a mesh has very few vertices. For example, a plane with four vertices, has nothing to interpolate over the plane surface. When only vertices are used, there is very little data.
With Advanced GPU (per-pixel) lighting, calculations occur for every pixel within the viewport, no matter how many vertices there are. This gives more data, and the larger the frame buffer, the more detail and data you get. The result is that you can now light the entire plane and see how light falls across the entire surface independent of how many vertices there are.
In order to display bump mapping in Rendered mode, the this setting must be checked.
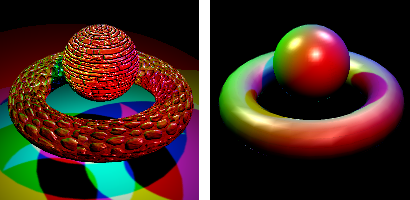
Advanced GPU lighting on (left) and off (right).
See: Wikipedia: Per-pixel lighting.
Rhino for Mac © 2010-2017 Robert McNeel & Associates. 24-Oct-2017