Rhino User's Guide for Windows
Modeling in 3‑D is the process of creating a mathematical representation of an object's surfaces. The resulting model is displayed on your screen as a two-dimensional image. Rhino provides tools for creating, displaying, and manipulating these surfaces.
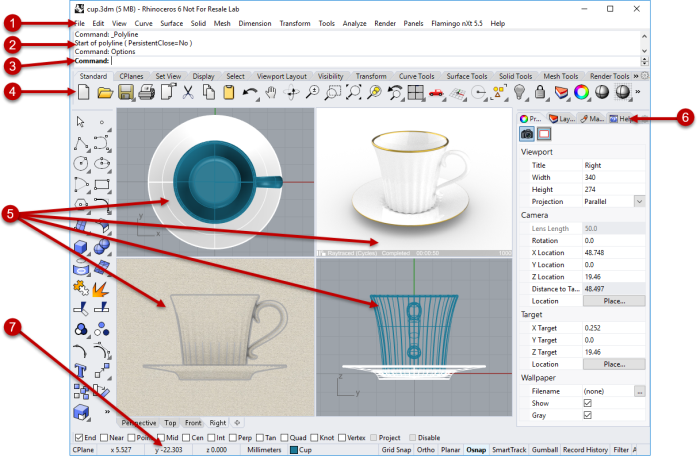
The image below illustrates some of the major features of the Rhino window.
The menus group Rhino commands by function.
The command history window displays the previous commands and prompts.
The command prompt displays prompts for the current command actions, options for the command that you can click, and allows typing command names and options.
Toolbars contain graphical icons for initiating commands. Many toolbar icons have a second command that you can access by right-clicking the icon. The tooltip that appears when you hover over the icon tells you what the left and right mouse button do.
 To access the command on the first line
 To access the command on the second line
Viewports display the Rhino working environment.
Tabbed panels contains layers, properties, and other settings.
The status bar is located at the bottom of the Rhino window. It displays the current coordinate system, the cursor location, and system unit. It also provides quick access to layers and toggles of modeling aids.
Rhino is a command-driven program. In other words, all actions are activated by named commands such as Line, Box, or CurvatureAnalysis.
Tip: To learn more about a command, use the Command Help panel. Or, run the command and press F1 to open its help topic.
Commands are accessed through the menus, or the toolbars, or by typing the command name. In the next sections, you will explore using these methods. You may find one method easier than another. The choice is yours, and there is no preference for one method over another.
In the exercises, you will use Rhino’s commands, navigation tools, shaded modes, render, and use some basic object manipulation.
Tip: To cancel a command any time, press the Esc key.
In this session you will:
On the File menu, click New.
In the Open Template File dialog box, select Small Objects - Centimeters.3dm, and click Open.
A template is a file that serves as a starting point for a new Rhino model. When starting a new model, Rhino provides default templates that set units appropriate for the model size, provide a few layers, and display a standard four-viewport layout.
Custom templates can include any kind of document information such as units, viewport layouts, layers, and even geometry. If you find yourself creating similar models over and over, set up and save a model as a template (see the SaveAsTemplate command in the Help). That way you will not have to spend time formatting your models each time you make a new one. You can start a new model from your own template, and start from there.
Most Rhino commands are located in the menus.
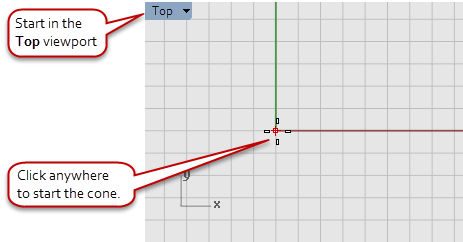
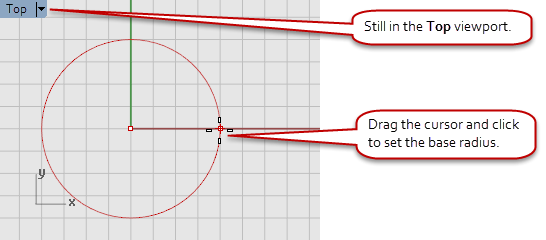
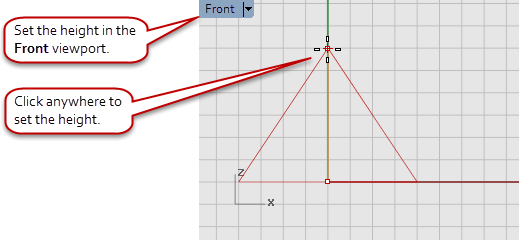
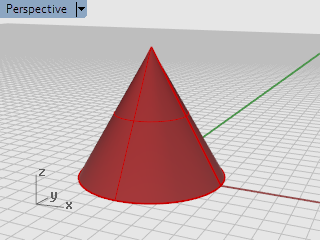
On the Solid menu, click Cone.
For Help with the Cone command, press F1 now or at any time during the command sequence.
Toolbars provide a graphic interface to the commands.
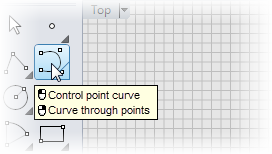
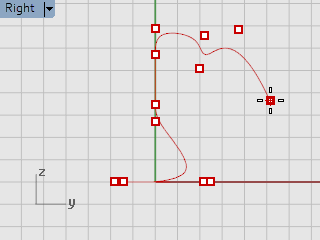
On the toolbar docked on the left side of the Rhino window, click the icon for Control point curve.
For Help with the Curve command, press F1 now or at any time during the command sequence.
You can start a command by typing the command name.
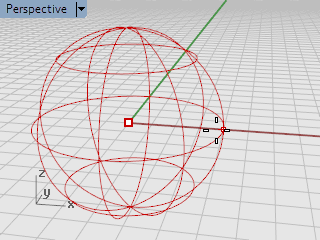
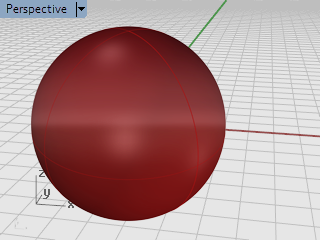
 Start the Sphere command by typing
When the command name Sphere appears, press Enter, or choose Sphere from the list.
For Help with the Sphere command, press F1 now or at any time during the command sequence.
The default option for the Sphere command is Center, Radius, so you can simply start drawing the center of the sphere.
On the Rhino Tools menu, click Options.
Under Rhino Options, click View and then click Display modes.
In the Display Modes dialog box, click the Help button.
If you did something you did not want to do, you can undo your actions.
On the Edit menu, click Undo.
Or press the Ctrl and Z keys.
You can undo a series of commands, or Redo the Undo if you go too far.
On the Edit menu, click Redo.
Or press the Ctrl and Y keys.
The command window contains the command history and the command prompt.
The window is normally docked at the top of the Rhino window, but you can float the command window just like any toolbar. You can dock it at the top or bottom of the Rhino window, above, below, or next to the main toolbar or the object snap toolbar.


It is a good idea to size the window so it displays at least three lines of text.
The command prompt is where you can type command names, set options, enter distances and angles for drawing, and read the prompts for the commands.
The command prompt displays options for the command in parentheses. To activate an option, click the option with the mouse or type the option name or the underlined letter in the option.
Options give you alternate methods for using the command. Prompts are messages to you to select objects to act on, to enter information, or to enter a point on the screen. As you start to build objects, prompts become increasingly important, since they tell you what to do next.
Command options change how a command acts. For example, when you draw a circle, the circle is normally drawn on the active construction plane. The Circle command has several options including Vertical and AroundCurve.
The options for the Circle command appear:
Center of circle (Deformable Vertical 2Point 3Point...)
Many tasks in Rhino are repetitive. You might want to move or copy several objects, for example. Methods for repeating commands are provided.
 To repeat the last command
These all perform the same function:
Click the right mouse button in a viewport.
Note: Some commands, such as Undo and Delete do not repeat. Instead, the command prior to these commands is repeated. This prevents you from accidentally undoing too many commands or deleting objects accidentally.
Also, you often want to repeat the command you were using before undoing a mistake. To suit your own way of working, you can define the list of commands that do not repeat in Tools > Options > General > Never repeat these commands.
Whenever you run the wrong command or do something wrong in the command procedure, you can cancel the command several ways.
 To cancel the current command
When a command is running:
The Rhino Help file is the major resource for detailed information on specific commands.
To get Help for a command, press F1 while the command is running.
The Help window appears with the specific command topic visible.
On the Help menu, click Command Help.
The Rhino Help will display in a dockable panel.
Click Auto-Update to dynamically display the Help topic for the current command.
On the Rhino Help menu, click Learn Rhino, and then click Tutorials and Samples.
Rhino for Windows © 2010-2018 Robert McNeel & Associates. 24-Nov-2021