Open navigation pane
Create Surfaces from Curves
A common way of working in 3-D is to draw curves that represent edges, profiles, cross-sections, or other surface features and then to use surfacing commands to create surfaces from those curves.
Edge curves
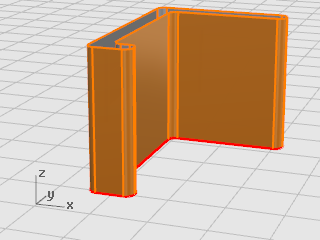
You can create a surface from three or four curves that form the sides of the surface.
 Create a surface from edge curves
|
2.
|
On the Surface menu, click Edge Curves. |
Tip: Open the
Help panel to review the help topic for the
EdgeSrf command.
|
3.
|
Select the four curves.
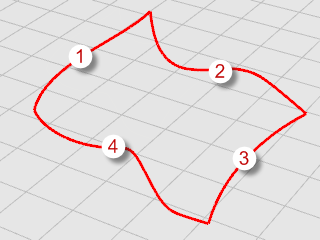
Objects change to yellow when you select them. A surface is created from the curves that form its edges. 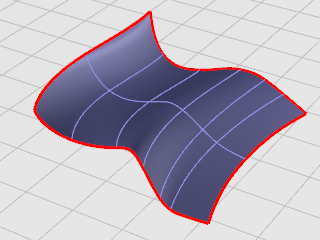
|
Extrude curves
Extruding creates surfaces by tracing the path of a curve in a straight line.
 Create an extruded surface
|
2.
|
On the Surface menu, click Extrude Curve, and then click Straight. |
Tip: Open the
Help panel to review the help topic for the
ExtrudeCrv command.
|
3.
|
Select the curve (1). 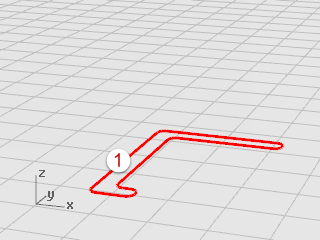
|
|
4.
|
At the Extrusion distance prompt, drag a distance with your mouse and click. 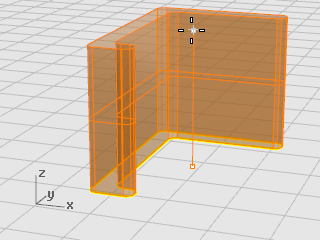
|
Loft curves
Lofting creates a smooth surface that blends between selected shape curves. This surface looks similar to the Sweep a curve with two rails example, but is created without rail curves. Instead, the edges of the surface are created by fitting smooth curves through the shape curves.
 Create a lofted surface
|
2.
|
On the Surface menu, click Loft. |
Tip: Open the
Help panel to review the help topic for the
Loft command.
|
3.
|
Select the three curves (1), (2), and (3), and press Enter. 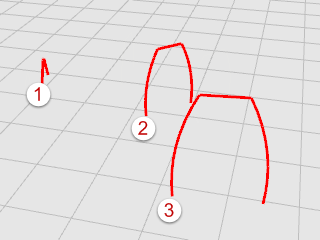
|
|
4.
|
In the Loft Options dialog box, click OK. 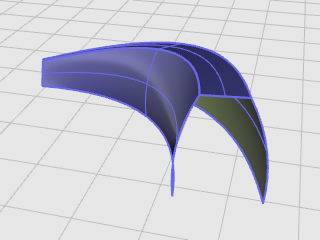
|
|
5.
|
Try some of the Style options and then click Preview to see the various loft styles. |
Revolve curves
Revolving a curve creates a surface by revolving a profile curve about an axis. This is sometimes called lathing.
 Create a revolved surface
|
2.
|
In the status bar, click Osnap. |
|
3.
|
In the Osnap control, click End. |
|
4.
|
On the Surface menu, click Revolve. |
Tip: Open the
Help panel to review the help topic for the
Revolve command.
|
5.
|
Select the profile curve (1) and press Enter. 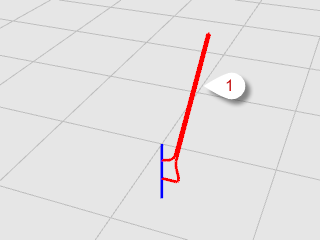
|
|
6.
|
At the Start of revolve axis prompt, snap to one end of the axis line (2). 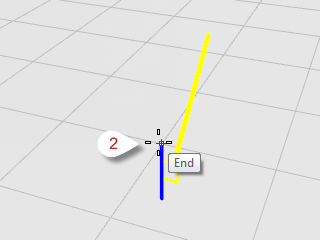
|
|
7.
|
At the End of revolve axis prompt, snap to the other end of the axis line (3). 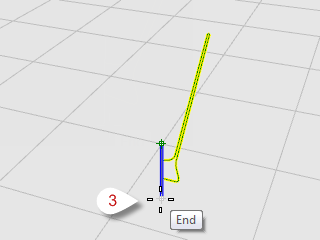
|
|
8.
|
At the Start angle... prompt, select the FullCircle option. 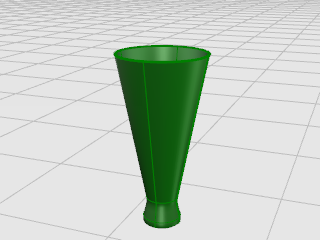
|
Revolve curves with a rail
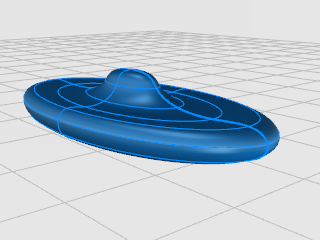
Rail revolve creates a surface by revolving a profile curve around an axis while at the same time following a rail curve. This is basically the same as Sweep Along 2 Rails, except one of the rails is a central point.
 Create a revolved surface with a rail curve
|
2.
|
On the Surface menu, click Rail Revolve. |
Tip: Open the
Help panel to review the help topic for the
RailRevolve command.
|
3.
|
Select the profile curve (1). 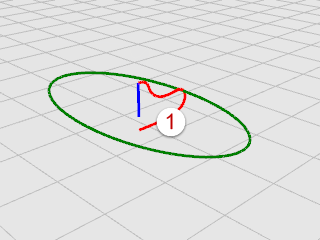
|
|
4.
|
At the Select rail curve... prompt, select the rail curve the revolve will follow (2). 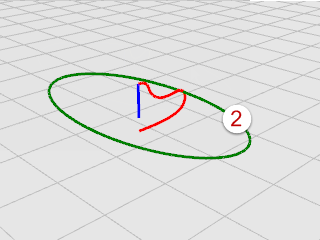
|
|
5.
|
At the Start of RailRevolve axis prompt, snap to an endpoint of the axis line (3). 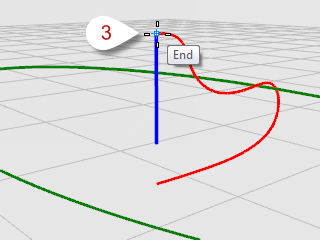
|
|
6.
|
At the End of RailRevolve axis prompt, snap to the other end of the axis line (4). 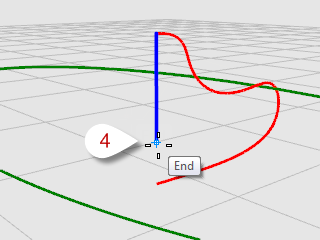
|
Sweep along one rail curve
Sweeping creates a surface with cross sections that maintain the initial orientation of the shape curve(s) to the path curve.
 Create a sweep surface
|
2.
|
On the Surface menu, click Sweep 1 Rail. |
Tip: Open the
Help panel to review the help topic for the
Sweep1 command.
|
3.
|
Select the rail curve (1). 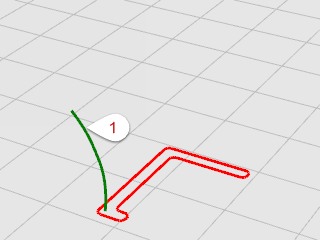
|
|
4.
|
At the Select cross section curves ... prompt, select the cross-section curve (2), and press Enter. 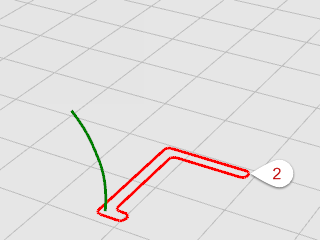
|
|
5.
|
In the Sweep 1 Rail Options dialog box, click OK. 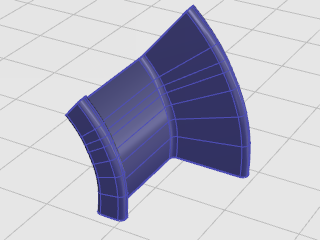
|
Sweep along two rail curves
Using two rails for a sweep creates a smooth surface through two or more shape curves that follow two curve rails. The rails also affect the overall shape of the surface. Use this command when you want to control the location of the edges of the surface.
 Create a sweep surface with two rail curves
|
2.
|
On the Surface menu, click Sweep 2 Rail. |
Tip: Open the
Help panel to review the help topic for the
Sweep2 command.
|
3.
|
Select the first rail curve (1). |
|
4.
|
At the Select second rail... prompt, select the second rail curve (2). 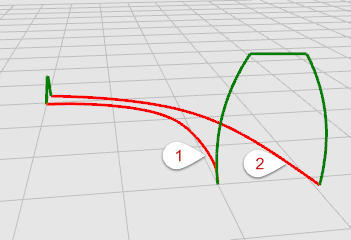
|
|
5.
|
At the Select cross section curves prompt, select the two cross-section curves (3) and (4), and press Enter. 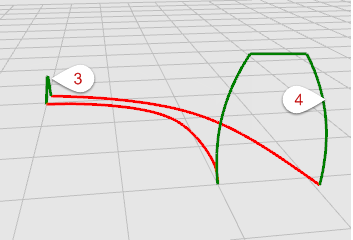
|
|
6.
|
In the Sweep 2 Rails Options dialog box, click OK. 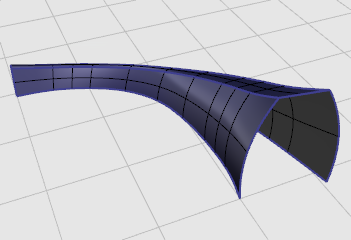
|