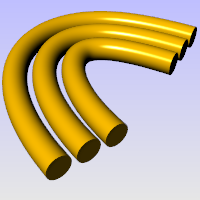
The Pipe command creates a surface with a circular profile around curves.
Steps
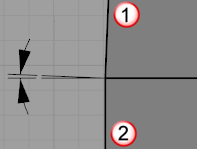
| 1. | Select one curve. |
| 2. | Pick the start radius at the beginning of the pipe. |
| 3. | If the curve is closed, pick the radius for the pipe. |
| 4. | Pick the radius at the end of the pipe. |
| 5. | Pick a point for the next radius, or press Enter to end the command. |
Command-line options
ChainEdges
Selects surface edges that are touching the selected curve.
Select the first segment.
ChainEdges options
AutoChain
Selecting a curve or surface edge automatically selects all curve segments connected with the level of continuity set by the ChainContinuity option.
ChainContinuity
Controls the level of continuity required between segments to be selected with the AutoChain option.
Direction
Forward
Selects curves in the positive curve direction.
Backward
Selects curves in the negative curve direction.
Both
Selects curves in both the positive and negative curve direction.
GapTolerance
If the gap between two edges/curves is less than this value, the chain selection will ignore the gap and will select the next segment.

AngleTolerance
When Continuity is set to Tangency, if the angle between two edges/curves is less than this value, the chain selection will consider the criteria for continuity met and will select the next segment.
Undo
Undo last segment selection.
Next
Select next segment.
All
Select all segments.
Multiple
Allows selecting more than one curve.
Pipe options
Diameter/Radius
Toggle between picking a Radius and picking a Diameter.
Thick=Yes/No
Determines whether the pipe has two walls or one.
Thick steps
| 1. | Pick the first start radius. |
| 2. | Pick the second start radius. |
| 3. | Pick the first end radius. |
| 4. | Pick the second end radius. |
Cap
Specifies how to cap the ends.
None
No cap.
Flat
Cap with planar surface.
Round
Cap with hemispherical surface.
FitRail=Yes/No
If the curve is a polycurve of lines and arcs, the curve is fit and a single surface is created; otherwise the result is a polysurface with joined surfaces created from the polycurve segments.
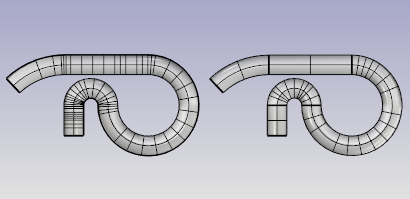
FitRail=Yes (left) and FitRail=No (right).
ShapeBlending (Single curve only)
Local
The pipe radius stays constant at the ends and changes more rapidly in the middle.
Global
The radius is linearly blended from one end to the other, creating pipes that taper from one radius to the other.
WallThickness (Single curve only)
Specifies the value for the distance between the inside and outside of the pipe.
Negative numbers make the first radius the outer core.
See also
Rhinoceros 5 © 2010-2015 Robert McNeel & Associates. 17-Sep-2015